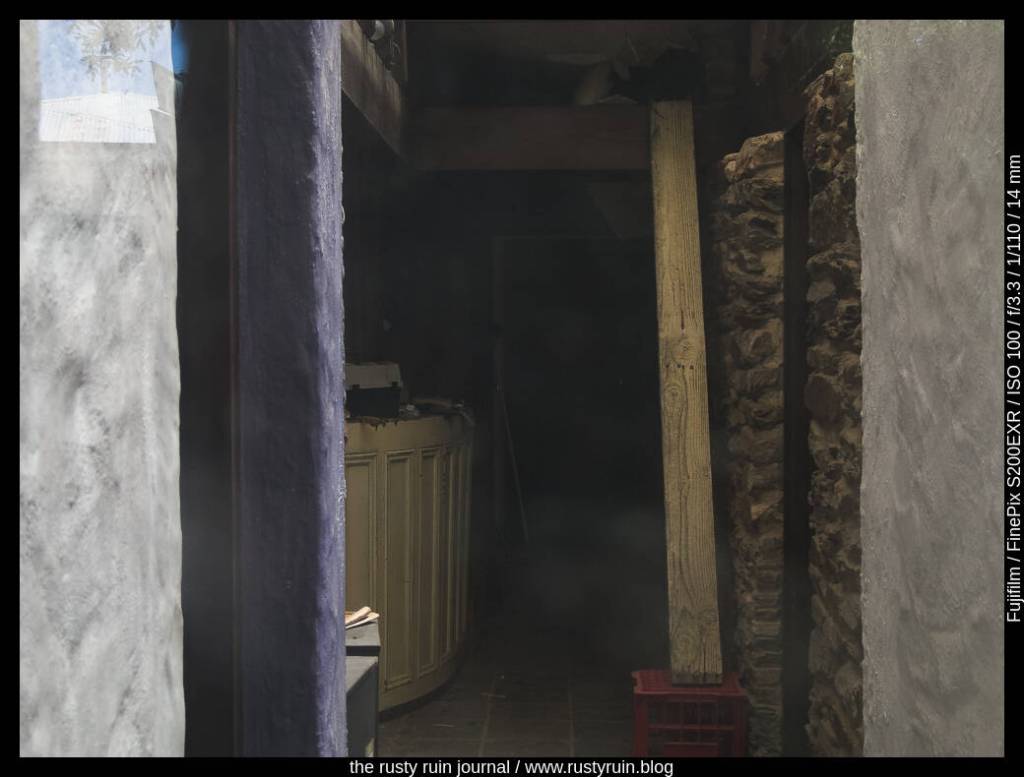
Sometimes, even on the sunniest day in a busy tourist town, you find an abandoned corner filled with dust and old newspapers yellowing at the edges. Once a licensed restaurant, the empty windows were of immediate interest and led to a hastening of my pace. I switched on the old Finepix camera and thought about initial settings and composition.
The old restaurant #1 ~ Fujifilm Finepix S200EXR
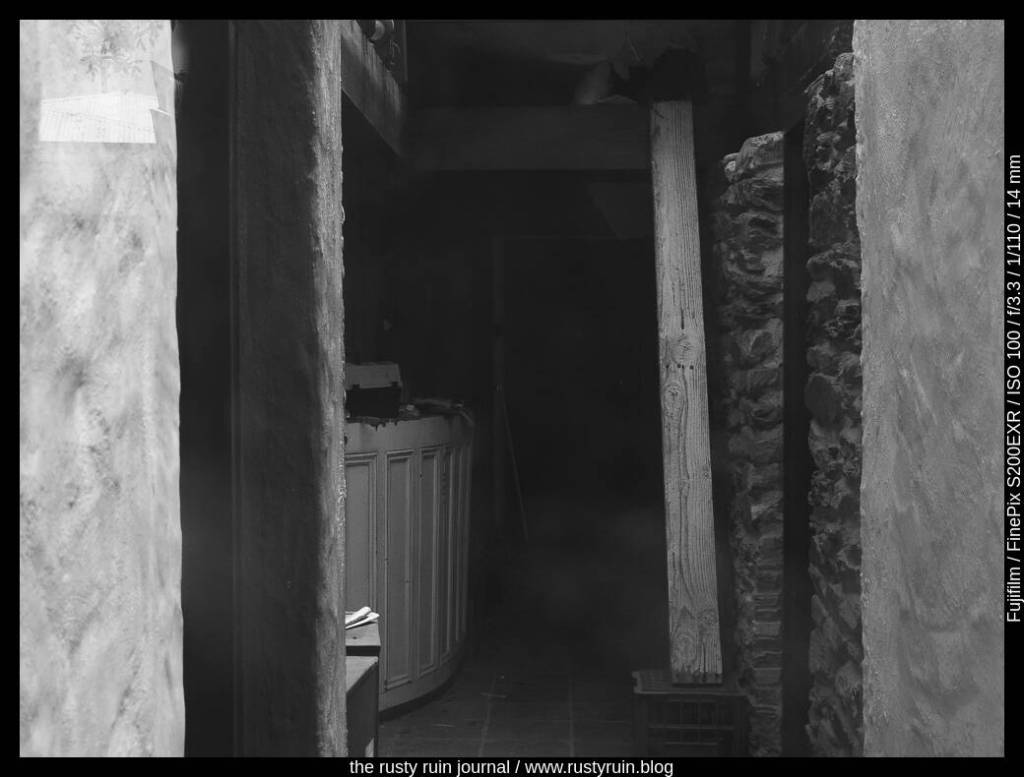
I like the way the sunlight illuminates key parts of the image and creates borders and frames: the white textured walls, the plank of timber, the blue wall, the papers stacked on a table, and a ceiling joist. Curious how this photo would look in a black and white conversion, I adjusted settings in Lightroom:
The old restaurant #2
Light and shadow tell much of the black and white photo story. I always start with those foundations. The contrast here is bumped a little more, the sunlight spilling gently over timbers and walls is pushed, and the shadows are pulled down to create depth and mystery. The plank of wood resting on the crate becomes more of a focal point and draws the eye further into the dust and darkness of the rooms beyond.
Some years back, I remember making photos of an Australian White Ibis – a wading bird that’s native to the country. It was a very sunny day and there was lots of light and shadow. In other words: lots of dynamic range for the camera to manage. Fortunately, the Nikon D7100 manages dynamic range pretty well and still stands up as a solid crop sensor camera today.
By my own admission, I was rushing and didn’t choose settings carefully enough. Here’s what the original photo looks like:
Australian White Ibis (original) – Nikon D7100
You can see how much dynamic range is in the photo – the feathers are bright white in the sun, and the interesting part of the photo – the head of the bird – is mostly in shadow. I probably should have switched to Spot Metering and focussed on the head of the Ibis to lift those shadows and preserve detail. That would also have blown out more of the bright parts of the feathers, so there’s a choice to be made. The other option is using a tripod and bracketing the shots to find a better exposure or stack them for an HDR edit to preserve as much dynamic range as possible. But it’s a living creature, and messing around with settings is not always ideal.
I had a stab at editing this old photo in Lightroom to see what could be done with it:
Ibis in blue – Nikon D7100
As you can see above, I was able to pull an impressive amount of detail from the Shadows. Despite the feathers looking blown out, I was also able to recover a lot of detail by pulling down the Highlights. I cropped to a 16:9 ratio to emphasise the length of the Ibis and the beak. Cropping out part of the highlights on the feathers brings more attention to the head of the bird and lessens the visual distraction of the bright white. I think it also balances the serpentine curves of the Ibis as the eye is drawn up the body, over the head, and down the beak.
I masked the background out and made the exposure, shadow and highlight adjustments seperately on the Ibis. By using a mask like this, my edits didn’t affect the background at all, and enabled me to duplicate and invert the mask and then alter the hue of the background through a colour dropper selection. Additionally, I applied a colour mask to the head of the Ibis and raised the exposure slightly, just to bring out even more detail. Finally, I converted to black and white and then applied a global colour in the Split Toning panel to create the cyan look. This is a simple way of emphasising texture and tone, and hiding stuff like chromatic aberrations or visually distacting colours.
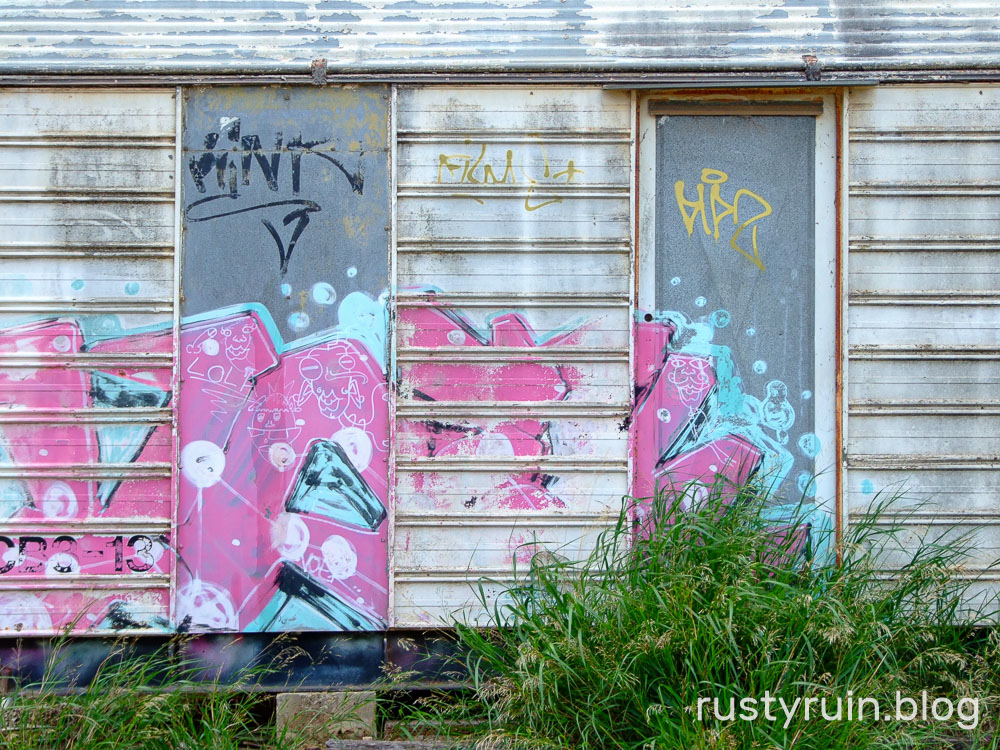
In a previous post, I rushed out with the Fuji Finepix 6500fd and was impressed by the camera’s ability to hold onto detail. Fast-forward to a cloudy Sunday and a last-minute invitation from family friends, and once more, the Finepix 6500fd is in my hands. It has the feel of a mini-DSLR and the manual zoom, unlike most other Finepix cameras from the 2000s era, really adds to this feeling.
Pink scrawls – Finepix 6500fd
At this point, I’m trusting the Automatic White Balance of the 6500 because it does an admirable job, even on a really cloudy day. At some point, there’ll be some sun, I hope! As you can see in the above image, out of cameras JPGs are nice and colourful. Of course, I have it set to JPG Fine, ISO 100, and the Fujichrome picture setting so that there’s more saturation of certain colours and extra contrast. I’ve yet to use the F-Standard setting.
Roadside groceries – Finepix 6500fd
Like most older digital cameras, it’s not great when it comes to preserving strong light and shadow areas. There’s a bit of a focus on preserving highlight and shadow detail in modern photos, but it really depends on the subject and the type of photo it is. Is there anything you really want to preserve in the highlights/shadows? Do strong highlight and shadow areas add punch and drama to your photo? These are really the questions that should be asked, and not just an assumption that these areas need detail all the time. In many cases, clipped highlights and blocked out shadows don’t matter and add visual interest.
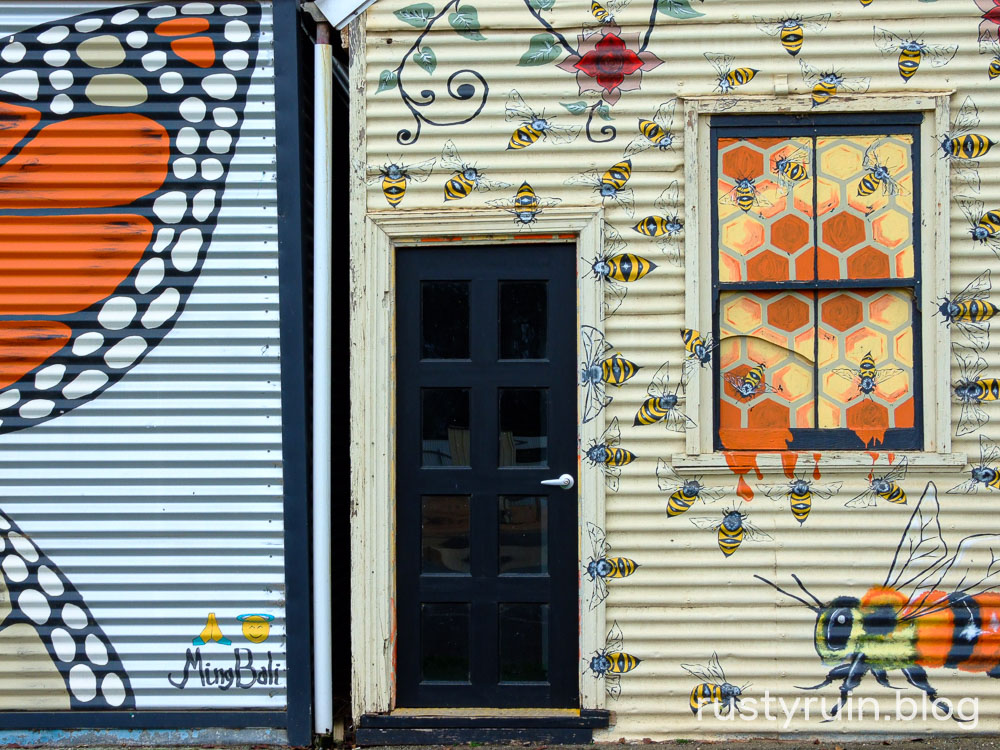
Bees and butterflies – Finepix 6500fd
I did also take out my Nikon D40 but I ended up bagging it because it seemed to be overexposing. As it happens, I think it was my error entirely. I’ll take it out again and check to see if it’s a mechanical issue with the shutter speeds or just me being completely stupid.
The cactus takes over – Finepix 6500fd
Because I set the Finepix to Soft sharpening levels, all of the JPGs benefit from some light extra sharpening in Lightroom. Using both Texture and Clarity in small amounts also brings the best out of this camera. I’d go so far as to say that the lens on the Finepix 6500fd is superb for the time, and it wrings the most out of the sensor to the point that a higher resolution sensor would likely be a better fit for the lens.