When deciding what camera gear to pack for a long holiday on the road, it’s true that I’ve never quite packed right. One can’t be prepared for all occasions and there’s always the thought in my mind that I need to pack light, lest I strain a muscle or two. As it turns out, I could have packed the optically superior 70-300mm Nikkor ED VR lens over the Nikkor 200mm DX VR. I should know by now that when deciding between packing light or packing heavier, but optically better, lenses, I should prioritise the better glass, even if it means a sore shoulder at the end of the day.
It’s not that the Nikkor 200mm is a terrible lens, it’s just old and performs better on older Nikon bodies that don’t demand so much resolving power from lenses. Even though the Nikon D3400 is a lightweight consumer-grade camera, Nikon still managed to squeeze in a top class crop sensor.
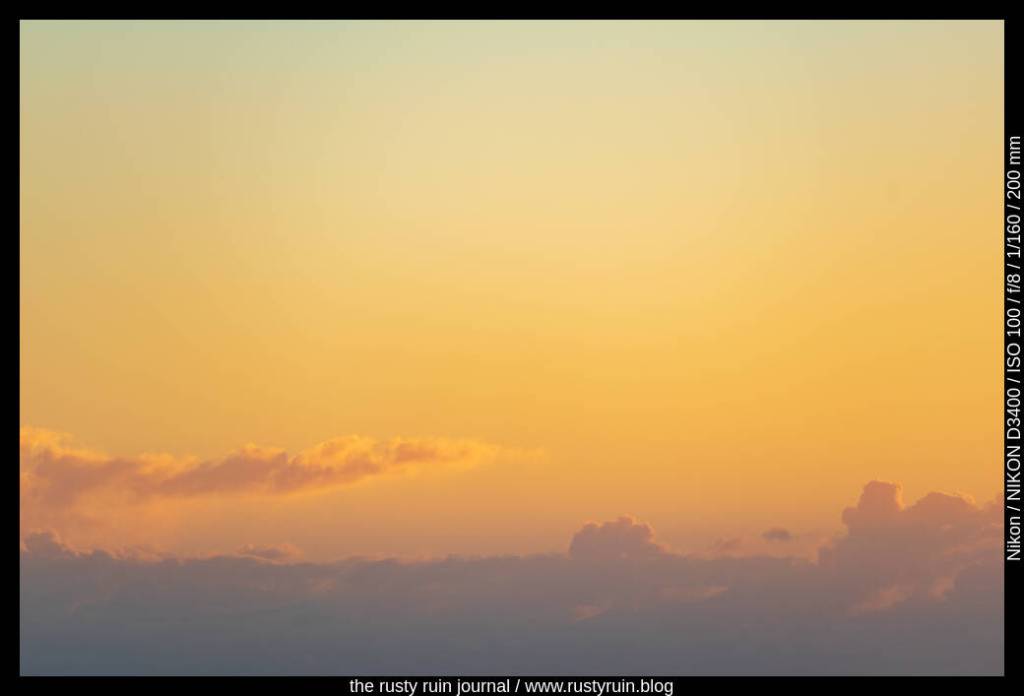
So, what to do when I need the extra reach that an optically questionable telephoto lens gives me, but it’s going to produce soft photos with lower contrast? This is where the available gear informs thought, idea, behaviour, and photographic practice. Optically inferior lenses are useful in their way ~ the shape and tonality of distant mountains shrouded in haze and evening mist – the colour of enormous clouds at sunrise. Even old glass is capable of good photos when limits are understood. If sharp detail isn’t possible, colour, tone, and shape may present as important themes, as in this case.
Mountains of blue, Townsville QLD – Nikon D3400 and Nikkor 200mm DX VR lensLong morning clouds near the Gulf of Carpentaria, QLD – Nikon D3400 and Nikkor 200mm DX lens
Finally, I’ve started to edit some of the photos from the recent road-trip. I made so many that I’ll probably have editing fodder for the next two years! The recent laptop upgrade has taken up most of my spare time ~ copying thousands of files across, wrangling new software installs, and adapting to a non-OLED screen. The upside is that the new laptop features desktop power in a portable plastic shell, so any photo editing software runs as smooth as glass made by NASA for the latest Space Shuttle build.
The third of three waterfalls, Atherton Tableland – Nikon D3400 and Nikkor 35mm lens
On this day, we were driving through the Atherton Tableland, via Atherton and Herberton. Somewhere along the road, we happened on short walking trails for three waterfalls. Not having had an opportunity for hiking up to this point in the road-trip, we leapt at the chance to enjoy the cool forests in the area.
As serene as the waterfall looks, the mess of tourists waiting on the viewing platform to make photos was anything but quiet! Having made my way to the front, I hurriedly reached for my Nikon D3400 and made some quick photos. I’d screwed in the Circular Polariser to minimise the stray reflections on foliage and water. Using a slower shutter speed of 1/60th of a second blurred the fast-running water to give it a milky effect. Because I was using the Nikkor 35mm lens, such a slowish shutter speed was unlikely to cause a blurry image, as long as I was still enough. Even if I’d wanted to use a tripod for extra stability, finding room in the crowd was not going to be easy.
Within moments of completing those initial photos with the D3400, I pulled out the Nikon Z5 and made some more. After a minute or two of switching settings and trying different positions on the muddy viewing platform, I felt the pressure of the tourists behind me waiting for their turn.
Just as I was about to put away the camera, a guy approached me casually swinging his Sony A7III and asked me to make a photo of him and his family – “Always best to ask a person with a good looking camera, right?”, he said (I wondered what he might have thought if I’d been using a glacially slow 20 year old Finepix). After checking the settings – shutter priority and face recognition – I obliged and handed it back. Almost as soon as I’d done this, a young woman walked up to me and handed me a one-shot film camera. I made a photo of her and her young overseas tourist group and wound on the film.
From a Nikon D3400 to a Nikon Z5 to a Sony A7II and then a cheap film camera. As I was the last of our group still lingering, I quickly left the scene and made my way back to the waiting car.
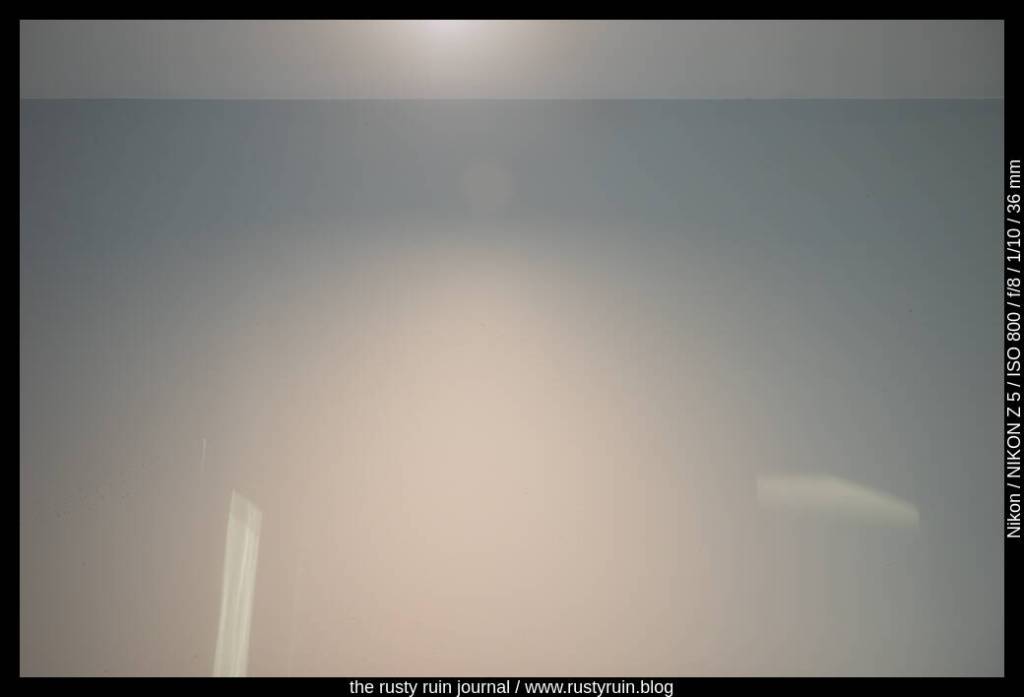
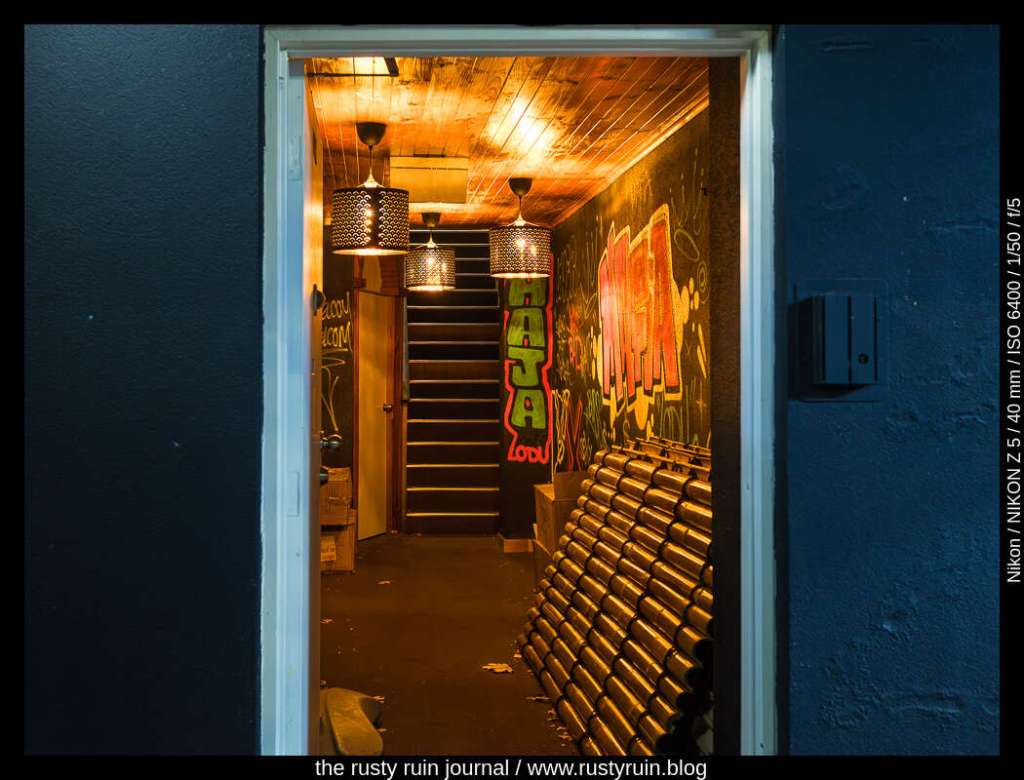
When the body is tired and sleep is needed – when the grey clouds amass and the wind blows – when the camera feels heavy and the ideas diminish – what to do? I stared into the corners of our sky-high holiday apartment and found inspiration in the artificial light. Thus, a mini-series of photographs presented themselves: quiet walls on quiet days.
Spending two weeks on the road, driving through multiple states, and racking up around 10 000 kilometres seems to have fuelled the desire to squeeze the most out of each day before the day job resumes. At 3 am on a cold Wednesday, we arose, grabbed the bags, and boarded a plane for Brisbane. This was in the week after returning from our two week 10k holiday!
I decided to take the Nikon Z5, the 24-70 F4S lens, the Nikkor 40mm F2 lens, and a recently acquired Tiffen Glimmerglass 1/8 filter.
Sleek, tall and modern – Nikon Z5
I was curious about what the Glimmerglass could do. I kept it on the Nikkor 24-70 F4S lens during the day and was pleasantly surprised at the results. The filter lowers contrast and smears light in the brightest areas of an image. This can create flaring when strong and direct light sources are involved, but I found the filter well-behaved for the most part.
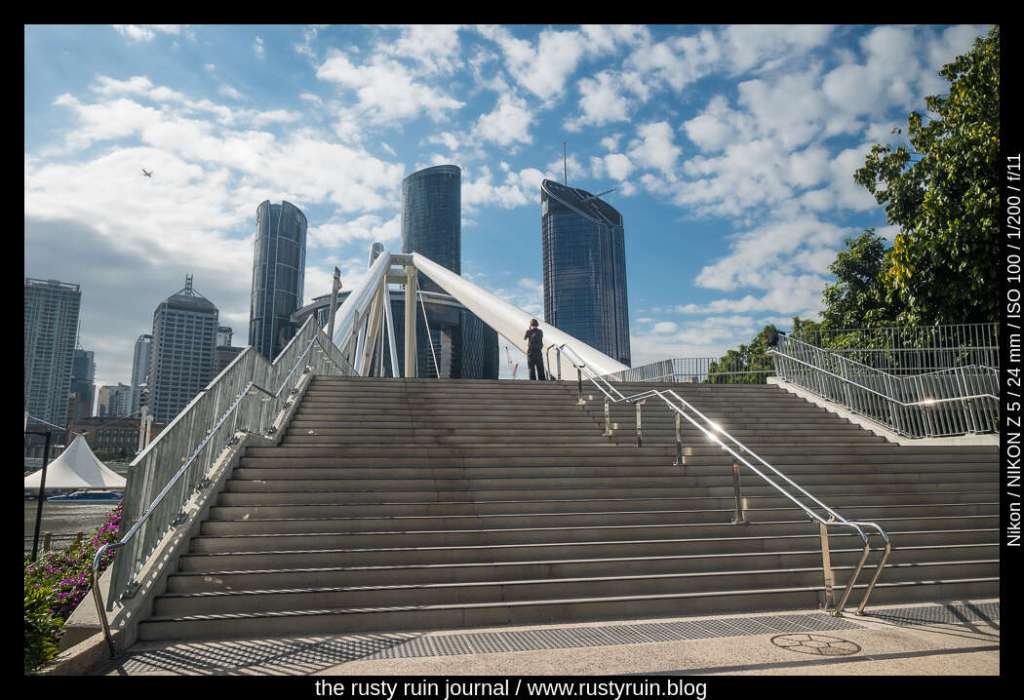
Plane-spotting around Queen’s Wharf – Nikon Z5
I really enjoyed the lines and angles around the Queen’s Wharf area of the city. It seems that others were also enjoyng the lines and angles of the bridge, as you can see in the photo above. A keen young man approached us to chat about the city and asked what kind of photography I was doing – “I really like the lines and angles around here.” I said with a smile. He was holding a Nikon D3xxx series camera and clicking away happily.
You can see how the Glimmerglass filter has lowered the overall contrast of the photo above. The light in bright areas, like the clouds and parts of the metal grab rails, is spread around. When some people suggest this filter results in a filmic look, I suspect they are referring to the halation around these bright areas. I like it. The result is not as obvious as some diffusion filters, like the Tiffen Black Pro-Mist. And at 1/8 strength, I think the Glimmerglass is regularly usable during the day and won’t announce itself strongly.
In the last two weeks, we drove ten thousand kilometeres, taking in numerous towns both dusty and tropical. It has been a holiday very long in the planning and the waiting! Now we’re all back home, the old routine is dominant, and our first night in outback accommodation, surrounded by red dust and diesel fumes, seems a distant memory. The ennui associated with returning home from such a journey has certainly hit!
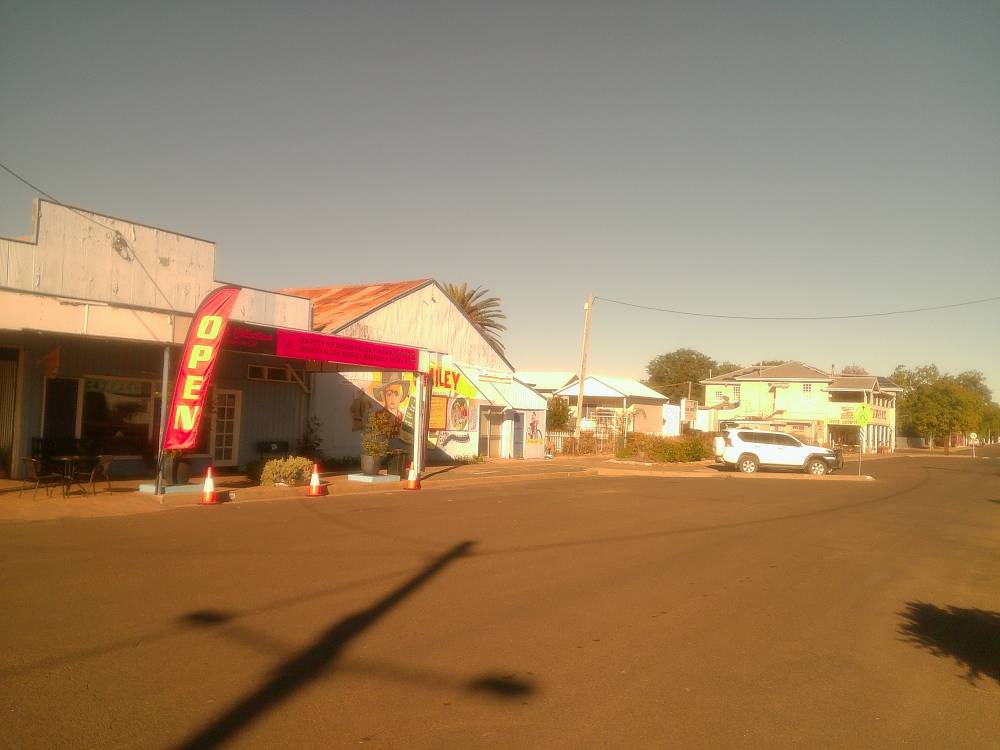
I did make many spur of the moment photos with the plastic Camp Snap. While most of them are mediocre, some are distinctly charming. As I spend time organising and editing the many photos made by my Nikon cameras in the coming months, here are some of the Camp Snap photos I like most:
Seen on an outback road in Queensland – Camp Snap
The warming and softening filters I tacked to the Camp Snap really add some mood to the scene and match well with the outback sun.
An old home in Augathella, QLD
One of my favourite towns from the trip is Augathella. Located in outback Queensland, it had a population of 321 as of 2021. The local cafe operator was eager to say that the town has a crime rate of zero.
Main street in Augathella
I always sense a feeling of state pride in Queenslanders, as though they represent the best of Australia and every other state is a pale cultural imitation. Every town seems to feature a gimmick, narrative, or site of historical significance to attract the nomads and tourists.
When you’re walking down a long road, it’s good to sometimes look back to see how far you’ve journeyed. Looking at the road winding behind can provide motivation to continue placing one foot in front of the other, even when you’re tired and the landscape seems to look the same in every direction. Similarly, reflecting on one’s photographic journey can generate new insights ~ where did it all begin? Why do I make photos of the things I do? How have I changed?
A Nikon camera, open doors, and self-compassion
I purchased my first DSLR – a Nikon D5100– in 2013. I’d known for some years that I had an interest in visual arts but I’d never been confident enough to do anything about it. In fact, for many years I told myself that I didn’t have the mindset to learn photography, citing my lack of mathematical and technical skill as reasonable obstacles to personal growth. In 2013, I decided to toss those limiting thought processes in the bin. In deciding to open the door to a new world of creativity and experience, I needed to be kind to myself. I needed to nurture self-compassion. I needed to allow myself to make mistakes so I could learn without the harsh self-judgement that so often foils personal growth.
A warm invitation, an open door – Nikon Z5
We’re often kinder to strangers than we are to ourselves. We grow up learning that we should treat others as we would like ourselves to be treated (do unto others as you would have them do unto you), yet we’re regularly too hard on ourselves and the mistakes we make. It’s wise to recognise that we’re all human, vulnerable, and in need of care and love, including self-care. Being kind towards others is only half of the story – we need to learn to be kind to ourselves, too.
Rather than seeing ourselves as isolated individuals competing with others for attention and acceptance, it’s healthier to see ourselves as we truly are: vulnerable human beings on a tiny blue dot, huddled together for warmth, love, and community with other human beings. Rather than our sense of self springing from the high levels of self-esteem that are often encouraged in us by the education system, our jobs, our families, and our society, it’s healthier to develop a sense of self-compassion – self-kindness rather than self-judgement, community rather than isolated individuals, and mindfulness rather than overidentification.
Fighting the little demon
I used to worry if I missed a moment with my camera. I’d curse myself for forgetting a setting or being too slow or not being brave enough. But the worry is misplaced. Those negative feelings increased stress and fed into a personal story that I wasn’t any good at photography – that it was all too hard and I should give it up.
There’s a negative part of us, a tiresome inner demon composed of trauma, fear, self-doubt, suffering, and anxiety, that actively wants us to fail and fall over because growing and learning isn’t easy at all – it requires energy, motivation, self-acceptance, and self-compassion. Part of growing is journeying into our inner world and confronting the little demon. That can be scary and difficult. It’s easier and safer to avoid the confrontation and focus on distractions.
Giving up is easy but walking down the road and dealing with self-doubt, pain, fear, and anxiety in your exhaustion so you can look back to see how far you’ve come is hard. It takes time and energy and the sort of motivation that isn’t easy to muster in a stressful world. It’s easier to remain rooted to the spot, sticking to your beliefs and self-beliefs, than it is to change. Change isn’t easy, but all of nature is change. Resisting change is like living in a sandcastle with the tide rolling in. The great Abstract-Expressionist, Jackson Pollock, once said “I am nature!”, when faced with criticism about his creative approach.
Hotel now closed – Nikon Z5
Not only do we have to fail so we can learn, we also need to permit ourselves to fail and make mistakes. Allowing our mistakes to limit us leads to personal stagnation. I’ve said for many years that I don’t want to place a full-stop on the things I do – better to pause to catch my breath and then move on. It may be one of the toughest things to do in a world where our mistakes are often saved on social media platforms and remote servers around the world. They can come back to haunt us and remind us of our self-perceived incompetence.
Sparkling in the dark – Olympus OMD EM5 Mark 2 and Yongnuo 25mm 1.7 lens
Perhaps the old saying should be: We should treat ourselves kindly and treat others as we treat ourselves (do unto others as you would do unto yourself).
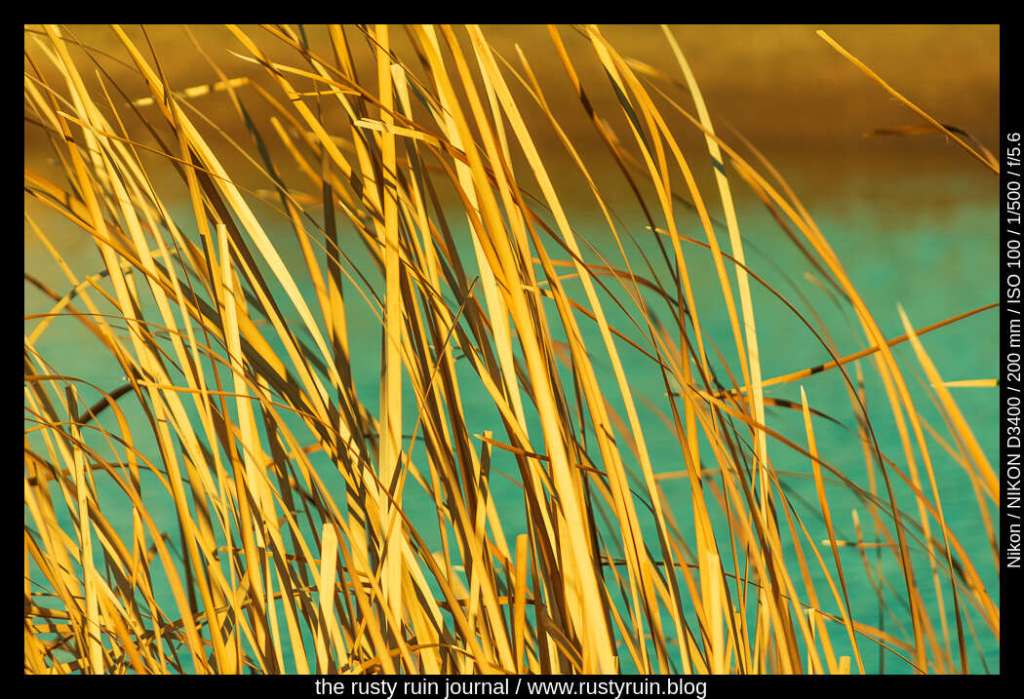
The road-trip is only days away and the table is covered in camera gear. I’ve already rushed out to test the Viltrox 28mm pancake lens on the Z5 and found it to be unexpectedly sharp and unusual. I’m intending on packing the Nikon D3400 for the holiday because it’s light, small, and offers excellent quality images. With this in mind, I tested it at the local wetlands.
Yellow reeds at sunset – Nikon D3400 and Nikkor DX 55-200mm 4-5.6 G lens
I’ve always nurtured a soft spot for the Nikkor 55-200mm DX lens – the largely plastic construction belies better than expected optical quality. I sold my original version and purchased the 55-300mm DX Nikkor some years ago, thinking I needed the extra reach. Even though it’s not optically poor, it never had the personality of the 55-200mm. It was mushy and unattractive at 300mm unless stopped down to f8 at a minumum. The 55-200mm also offers more pleasing out of focus areas – or bokeh.
In use, the Nikon D3400 feels as plastic as it looks. The external buttons are functional and generally well-placed but offer hollow haptics beneath fingertips. I also kept moving the focus point because I was smushing the four-way pad on the back accidentally. It was one of Nikon’s lightest and cheapest entry-level cameras and certainly feels it.
Despite the build quality, the image quality is excellent. I have no complaints in my rushed testing. My outing was less about the characteristics of the attached lens and more about checking whether the camera itself was in good order after picking it up second-hand with just over 1000 shutter clicks. So far, so good…
When processing the raw file above, I found some odd behaviour in Lightroom. When choosing any one of Daylight, Cloudy, or Shade White Balance presets to see how they looked, a lot of green was added to the image, as you can see below. I don’t mind it, but I’m not sure why it’s happening.
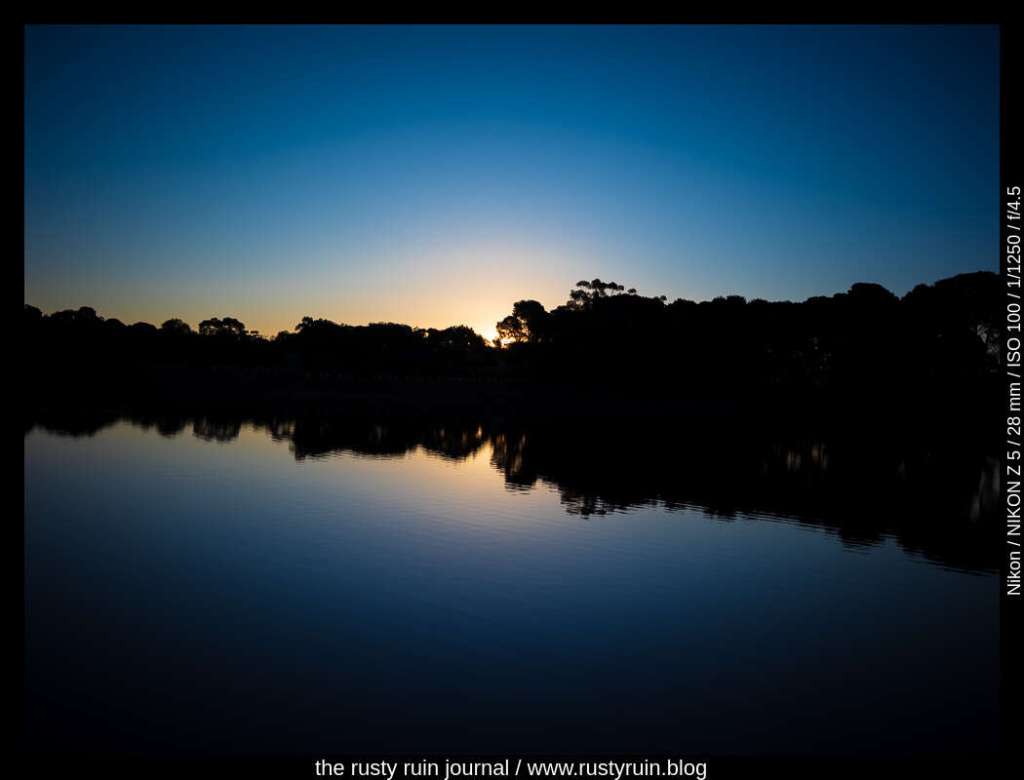
As much as I’d like to buy everything Nikkor, it’s an expensive exercise. Luckily, companies like Viltrox are doing interesting things in the world of camera lenses by providing inexpensive alternatives to Nikon’s offerings for the Z mount. The tiny Viltrox 28mm f4.5 is a lightweight, very flat, and slightly strange lens. Seeing as I’m planning to pack it for the road-trip, I thought I’d take it out for a few rushed test photos.
Catching last colours over the pond – Nikon Z5 and Viltrox AF 28mm f4.5 pancake lens
The lens is sharper than I thought it would be for the price. As with many lenses, the central area is the sharpest, with the corners and edges being less sharp. However, nothing is awfully mushy or unacceptable. There’s no aperture mechanism in the lens, so it’s always operating at f4.5. This can either be liberating or frustrating. I found it a nice change from my usual approach because the lack of aperture control alleviated some of the technical cognitive load. Since it’s a 28mm focal length, f4.5 provides pretty good depth of field for most purposes.
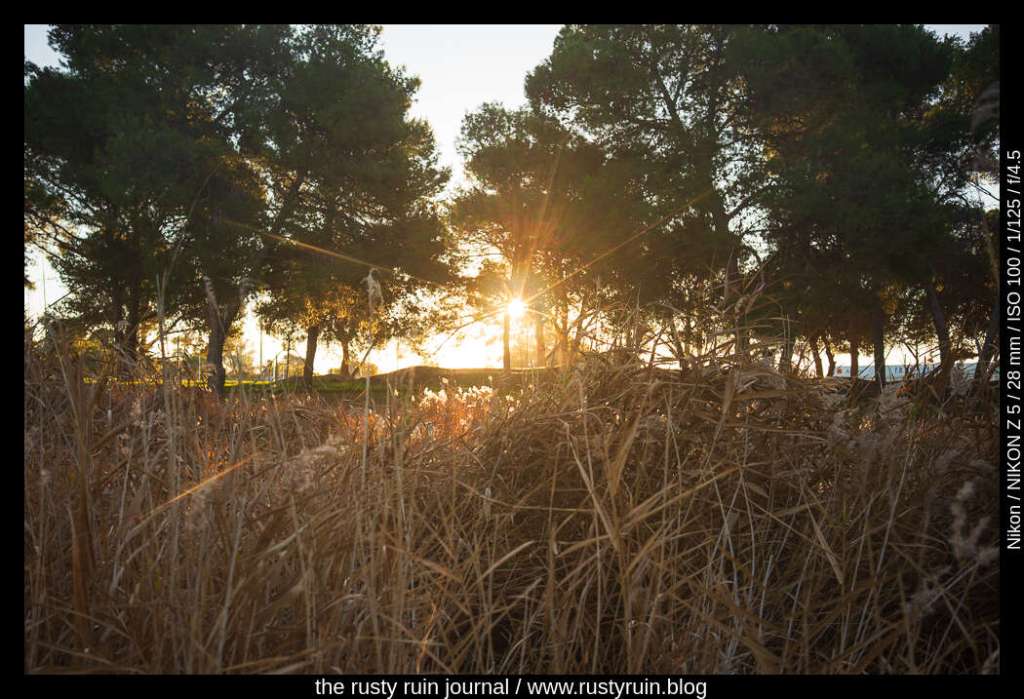
Sunstars and brown reeds
It’s not the greatest photo, but you can see the dramatic sunstar the lens created around the setting sun. Viltrox have included an octagonal mask inside the lens that produces sunstars with long rays. In practice, I found the light needs to be quite strong to produce a visible effect, so it’s not going to be apparent in every photo. Some people won’t like it, but I think it’s a nice point of difference. I also like the accompanying veiling flare across the frame. I imagine this lens is capable of producing some dreamy images in the right light.
How many cameras do you pack when you go on a road-trip/holiday/vacation/adventure? If you’re not a photographer, you might pack one camera. Or maybe you just pocket your smartphone and use that for all photos?
In my previous post, I was thinking aloud about what camera gear to pack for our impending road trip. In the comment section, another blogger, Disperser Tracks, asked me why I’d pack as much as I’m planning to if the goal is to pack light? It’s a great question and one that has often crossed my mind.
Bags everywhere – Nikon D5100 and Tamron 17-50
If my ultimate goal is to pack lightly, why not just pack the smallest and lightest camera I have and be done with it? Why bother packing anything else? Why cram gear into bags that are bursting at the seams?
Is it about ego and vanity? Am I trying to look impressive in the field? I don’t think so. I rarely meet other photographers on my travels. I’ve used all kinds of cameras, crappy lenses, and pieces of plastic when standing near photographers with expensive lenses and cameras. I’m interested in what they’re using and what they’re doing, but I don’t think about how I look next to them. Feeling insecure was an issue when I first started with a DSLR, but not now. I’m comfortable with my photographic approach. I make vast efforts to be aware of my inner world, my motivations, my reason for doing something, my intent, and my beliefs.
What about being prepared? Photo opportunities on the road are often last-minute stops. There isn’t much time to swap lenses and fiddle about. Having two camera bodies with different lenses mounted allows me to choose the best option quickly. Do I need a fast prime lens? Got that on my Nikon Z5. Do I need a telephoto? Got that mounted on the Nikon D3400 today.
It’s about the game of mounts. I actually don’t have a telephoto lens for my Nikon Z5 in the native Z mount but I do have one in F mount for my older Nikons. It makes sense to use the right lens for the right body. Likewise, I have a wide 20mm Z mount lens for my Nikon Z5 but not one for my older F mount Nikon cameras.
Yes, I’m a bit of a novelty seeker. I love cameras and I love photography. I enjoy all of my cameras and like to have options when on the road. Sometimes a Nikon Z5 will serve the moment and other times a Nikon D40X will bring me joy. If something makes a photo, I’m interested. I’ll also pack the Campsnap for some lo-fi fun.
Unfortunately, cameras have failed on me. Last year, I had my amazing Sigma Foveoncamera fail me in the field as the shutter mechanism malfunctioned. Several years ago, my Olympus EM5 Mark 1 failed me on a day-trip. Call it bad luck, I guess. I pack other cameras just in case something breaks. Call it paranoia!
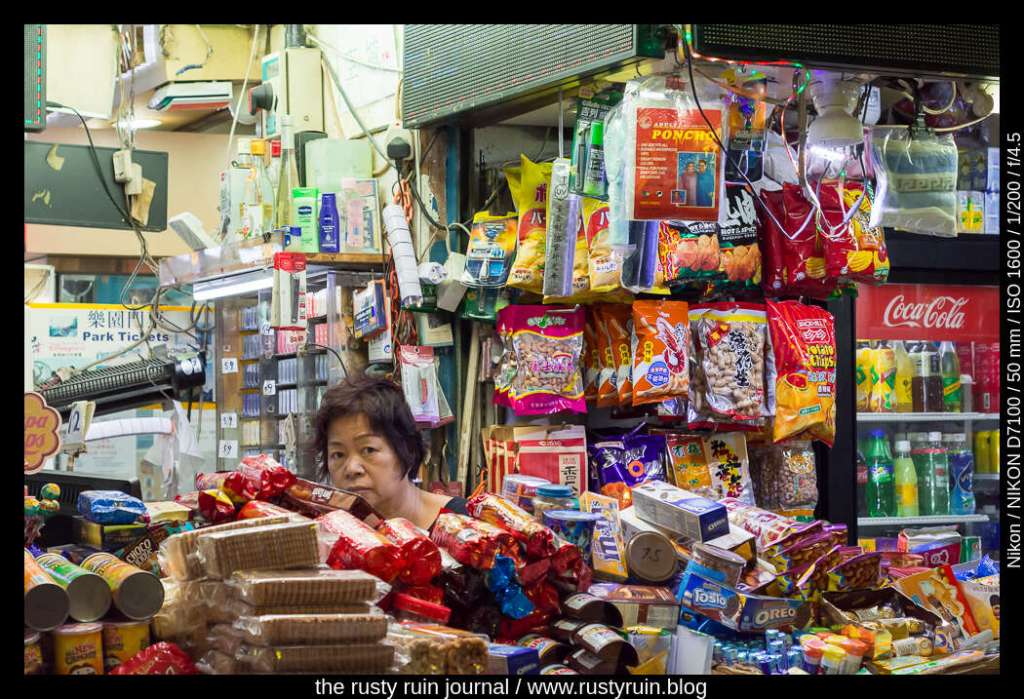
Surrounded by stuff – Nikon D7100 and Nikkor 50mm 1.8 lens
Our road-trip is just around the corner and my thoughts have turned to packing camera gear – if I’m not charging batteries, I’m agonising over lenses or bag capacity! Last year, I packed too much for the road. One evening on the aforementioned trip, I ended up clambering over red dirt-hills with two shoulder bags crammed with gear ~ each bag worn cross-bodied. I was fumbling with cameras, switching lenses at dusk in dusty conditions, jogging to catch the vanishing light, and dropping lens caps. At the time, I made a promise to pack more rationally for big trips like that. So, here I am again, with my camera stuff covering the table.
I see you in the dark corner – Nikon Z5 and Nikkor 40mm f2 lens
One thing I’ve always liked about the Nikon Corporation is that the engineers have never skimped on putting good quality digital sensors in their cameras at all pricing levels. Even in the 3xxx beginner DSLR line, the image making capacity has always been top-notch. This is why I’ve no qualms about packing a Nikon D3400 in my bag for the road ~ a 24.2 megapixel DSLR announced in 2016 that only weighs 395g without the battery or a lens. And the sensor in the D3400 is no slouch – it bests the Toshiba-made CMOS sensor in my beloved D7100. It has greater dynamic range, more colour depth, and excellent ISO range. It will sit right next to my Nikon Z5 very easily.
More importantly, the D3400 is so light! All of that photo-making capacity in such a light plastic body. For this road adventure, I think it will get a lot more use than my significantly heavier and bulkier D7100 did on the trip last year. It doesn’t have the speed of the high-end Nikon bodies and it lacks lots of external controls but none of that matters because my photography needs don’t cross into the high-speed fanaticism of sports or wildlife photography – apart, perhaps, from the odd photo of a sitting duck or two.
Empty chairs & night reflections – Nikon Z5
Since my needs are simple, a simple body will suffice. It’s a light camera that offers great image quality. The right tool for the right job, according to need. Nikon may brand it a beginner’s DSLR, but it offers more than enough control and photo-mojo for my needs: It enables me to make photos, it has a button I can program to change ISO, and it offers me plenty of control over light. Calling it a beginner DSLR is mostly about Nikon rationalising their camera lines and appealing to different kinds of photographers – you’re into fast sports? Get our super fast full–frame camera! You’re into photos of birthday parties? Get this beginner DSLR instead!
I’ve yet to really use the D3400 seriously, but it strikes me as an interesting camera. Released by Nikon at a time when small and sexy mirrorless cameras were fast taking market-share from the DSLR duopoly of Canon and Nikon, the D3400 seems like the last gasp of an old company that hadn’t quite realised the grim future of the bulky DSLR and they were desperately trying to downsize their cameras to appeal to consumers who were already buying into smaller and lighter mirrorless models.