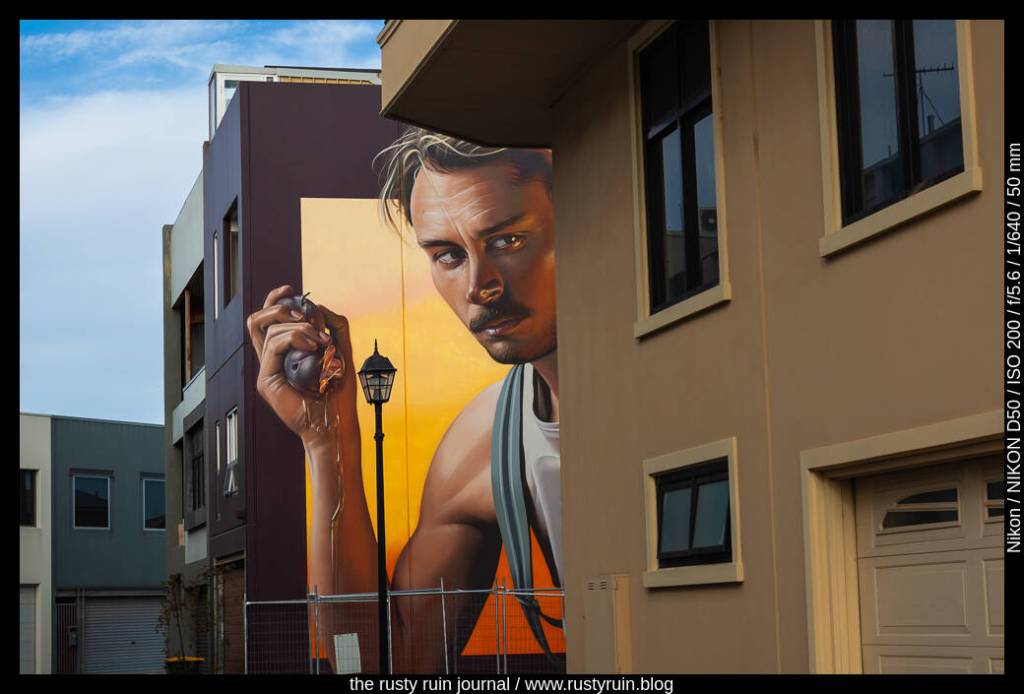
The Nikon D50 appeals to me because it sits somewhere between the small Nikon D40 and the prosumer Nikon D70/D70s. With a plastic body that’s closer in style to 1990s Nikon film SLRs like the F65, it seems a world away from Nikon’s current black, sleek, industrial-feel mirrorless cameras and Z-mount lenses. The silver-bodied D50 I have may be technologically long in the tooth, but the 6.1 megapixel sensor still packs an imaging punch when used with careful intent.
Looking at you – Nikon D50 and Nikkor 50mm AF-D 1.8 lens
The Nikkor 50mm 1.8 AF-D is one of my favourite lenses, and I can use it on the D50 because the body includes a screw-drive motor. Not only is the lens light and small, but the glass happens to be sharp and practically distortion-free. On the D50, it’s a perfect match, squeezing everything from the 6.1 megapixel CCD sensor. Even at base 200 ISO, the D50 is very quiet when it comes to digital noise.
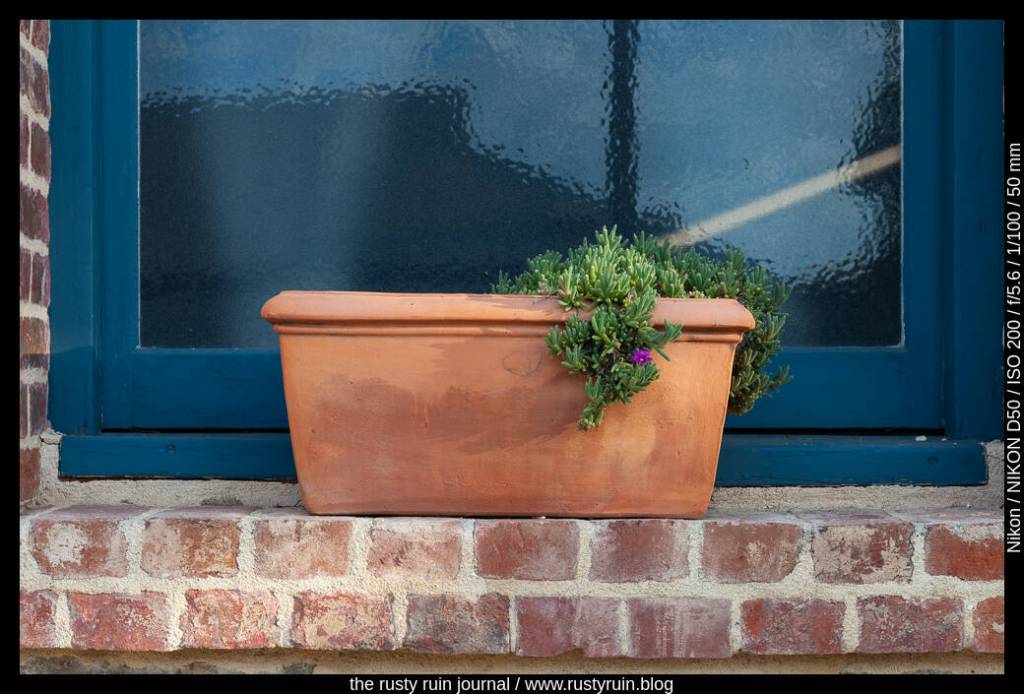
Against the blue window, green foliage spills over warm terracotta – Nikon D50
This is the sort of camera and lens combination that invites contemplative photography at sunset on an overly warm eve. Old buildings, weathered window frames, and glowing reflections put me in mind to simply wander and open my eyes to vast possibility. Something about the terracotta on blue, framed by red brick, drew my imagination – ordinary, understated, usually unnoticed, and quiet.
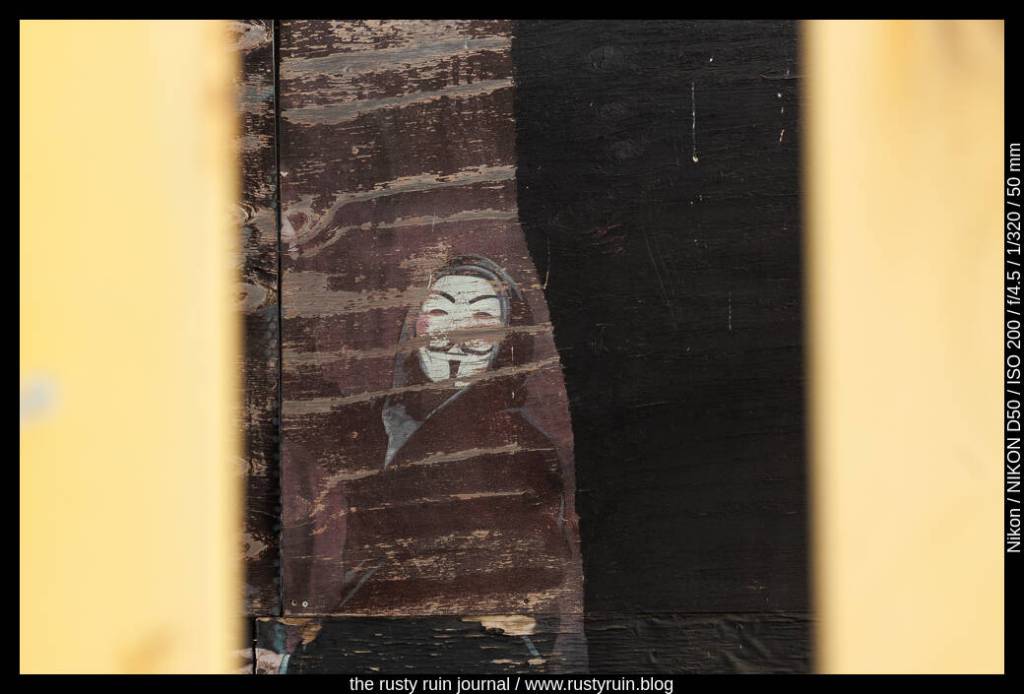
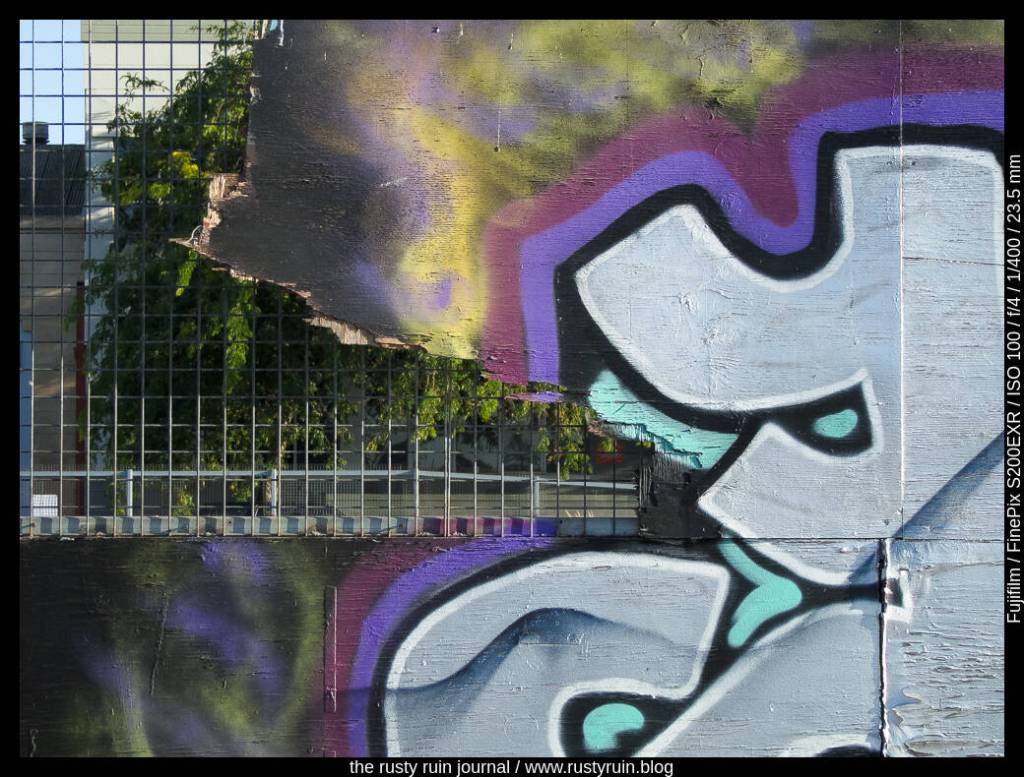
The face between the yellow bars – Nikon D50
Getting close to the yellow bars and setting the aperture to F4.5 allowed me to sufficiently blur them, communicate depth and dimensionality, and still maintain excellent sharpness in the peeling paint and the smiling figure – the subject of the photo.
The Nikon D50 fills an old DSLR usage gap for me – small and light enough to pack with another camera for the day; the ability to use AF-D lenses like the aforementioned Nikkor 50mm 1.8 due to the included screw-drive focus motor; and a top-plate LCD that communicates the most common camera settings at a glance.
A big optical zoom that starts at 30.5 mm and ends at 436mm (F2.8 to F5.3),
DSLR-like styling and external buttons,
A largish, by bridge camera standards, 8x6mm (1/1.6th inch) sensor,
And a 200 000 dot electronic viewfinder.
In many ways, it feels modern, though the speed of processing is definitely of the 2009 variety. Still, I can save in both JPG and CCD-RAW, unlike previous Fujifilm bridge cameras.
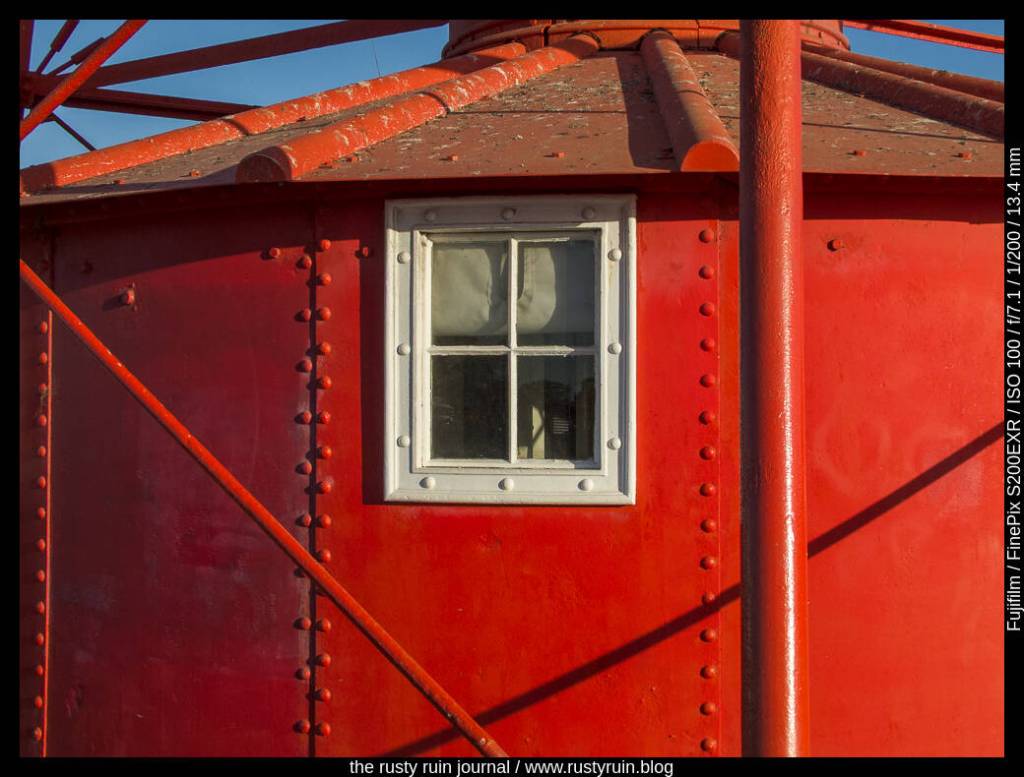
The old red lighthouse – Fuji Finepix S200 EXR
The octagonal pixels that Fujifilm packed into these old sensors might seem odd by today’s standards, but the tech produces photos said to contain extra highlight information. It’s not terribly easy to verify this, as I’m still trying to work out the weird digital alchemy that results in:
Strange cross-hatch image artifacts in some 12 megapixel images,
12 megapixel TIFF files that can only be created from RAF files in an aging program called S7raw – built almost exclusively to read CCD-RAW files from these later Fuji cameras,
JPGs and RAF files that are 12 megapixels in any of the PASM modes and High ResolutionEXR mode, or 6 megapixels in the Dynamic Range or Low Noise EXR modes.
It’s a lot to digest and also explains why some people describe this camera as a JPG machine ~ they clearly have better things to do with their time than mess with TIFF and RAF files. This makes it a complex camera on the inside. And as much as I like that the S200EXR offers classic Fujifilm JPG recipes – Provia, Astia, Velvia, and BW – the menu organisation also reflects the complexity of options available.
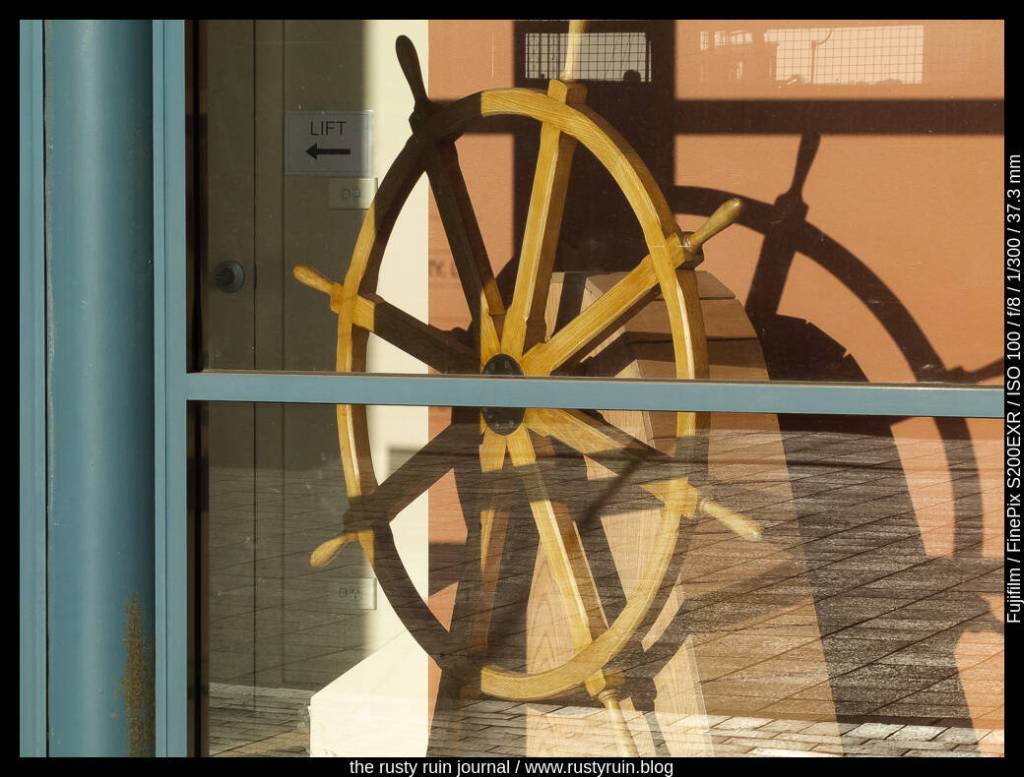
Ahoy Captain! – Finepix S200EXR
The seperate EXR option on the dial offers three special modes: 12 megapixel High Resolution photos that use all of the sensor pixels, 6 megapixel Dynamic Range photos that preserve more detail in shadows and highlights, and 6 megapixel images in the High ISO Low Noise mode. Weirdly, the regular PASM functions don’t offer any of the three EXR special modes and create regular 12 megapixel photos that use a different kind of dynamic range preservation technology.
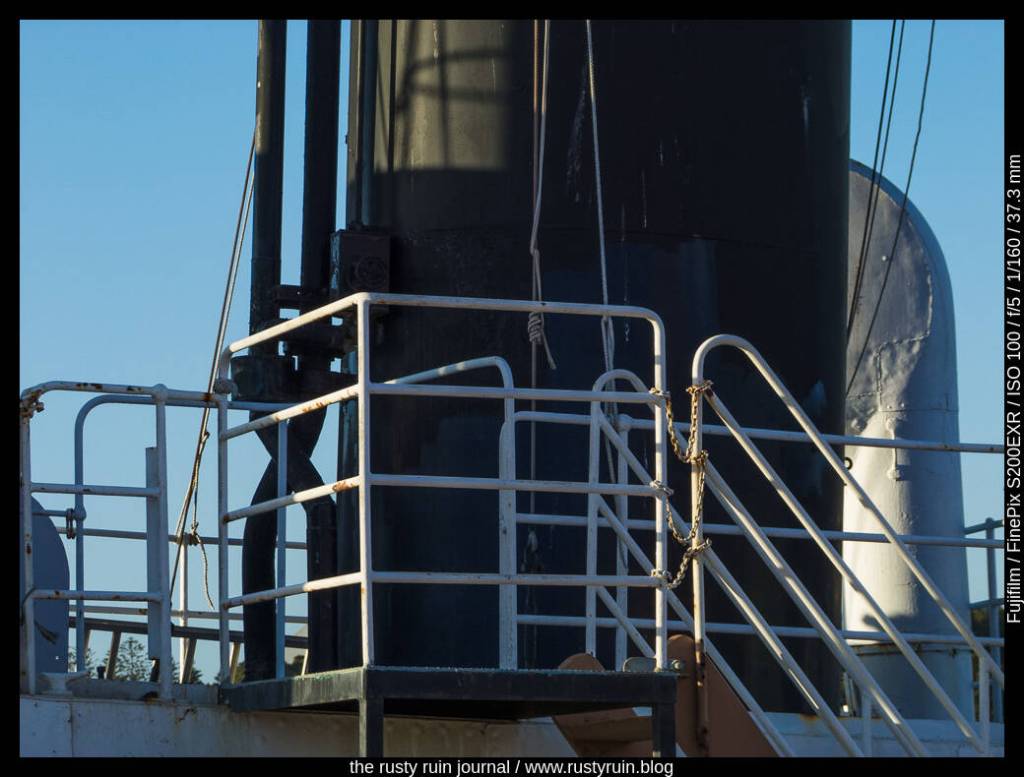
Rails and pipes – Fuji Finepix S200 EXR– plenty of detail in the shadows, even in this 6 megapixel image
I’ve found that importing the RAF files into Lightroom is the most convenient option in all cases. The imported 6 megapixel images from RAF files recorded in two of the EXR modes seem to be the darker of two exposures – or at least the darkest part of whatever data lives in the mystical RAF files. It seems likely that Lightroom is throwing away some of the data from the smaller octagonal pixels that preserve extra highlight information. A RAF file recorded in any of the PASM modes results in a 12 megapixel image, and Lightroom imports them just fine – this is my preference going forward.
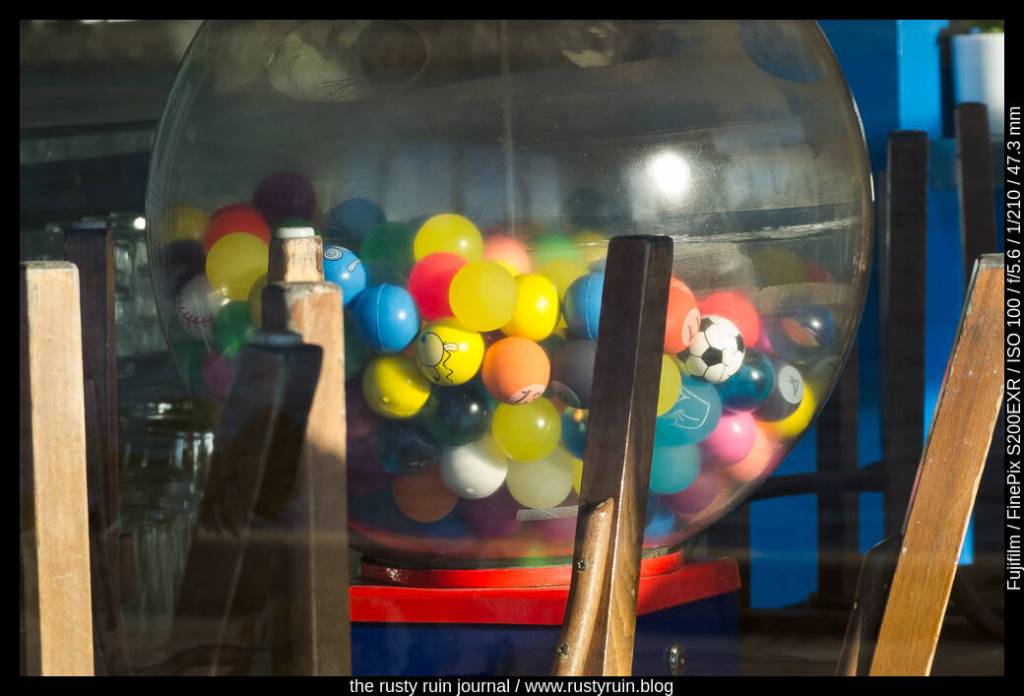
Balls balls balls – Fujifilm Finepix S200EXR
It seems that the EXR line of cameras represented the pinnacle of Fujifilm’s longstanding SuperCCD sensor technology. Not too long after these premium bridge cameras and their strange alchemical sensors, the company moved to CMOS and their X-Trans technology. Despite the complexities of the camera, I find the images very pleasant.
If you’d told me 15 years ago that my 1 megapixel Kodak would become a vintage digicam fetish item for Gen Z, I might have been amused. At the time, I was looking for tech-upgrades I could afford. It was all about more megapixels, as that seemed to be the measure of a digital camera in the 2000s – a time when companies thought they had a chance to revive their fortunes after the film era.
I might not be Gen Z, but it’s nice to use these old cameras again. Exploring macro modes, slow start-up times accompanied by bell chimes, and outdated storage media (XD card, anyone?) reminds me of how exciting the digital camera market was back then. Even a company like Casio – largely known for calculators and watches –was dipping their toes into a market that was fresh and ripe for innovation.
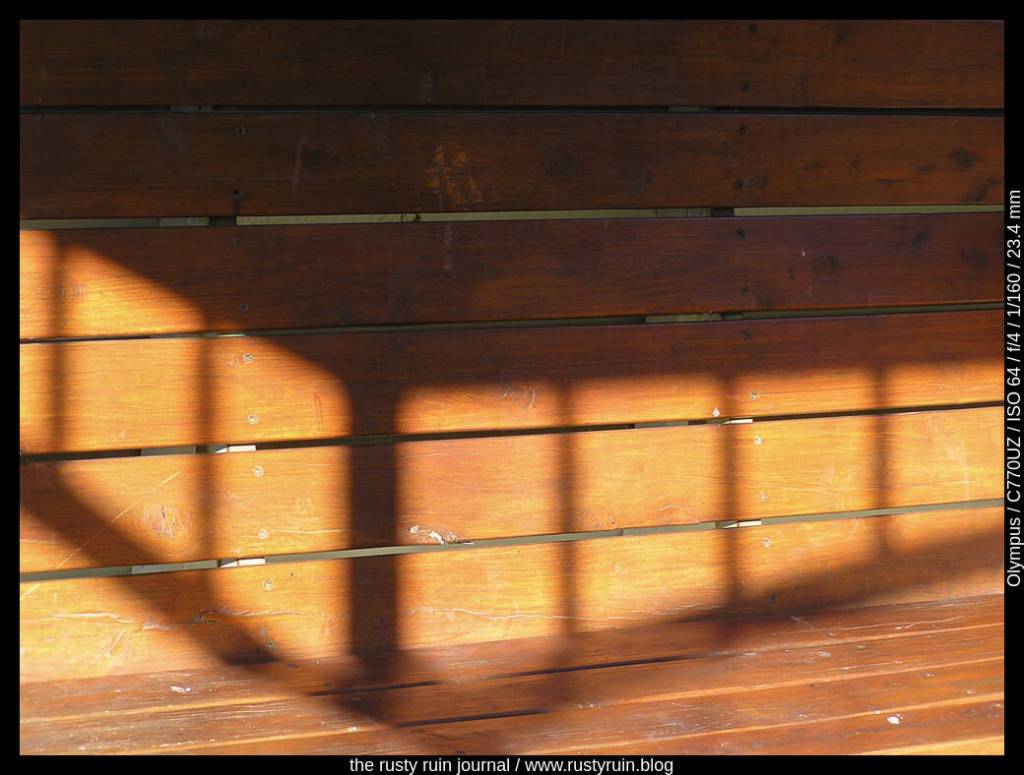
Soft shadows on wood #1 – Olympus C-770
For those of us who lived through it, this particular past doesn’t hold the mythical gold that Gen Z thinks it does, but it’s also perfectly natural to yearn for brighter yesterdays, especially when today is so obsessed with both the perfection of the image and the kind of moral purity testing that accompanies a technology layer that weaves relentlessly through our lives, recording our thoughts and feelings so that we’re not allowed to ever forget or forgive.
Despite the nostalgia, there are other benefits to reviving old digital cameras:
Save the environment by not chucking out a perfectly usable old camera. Companies tapping viciously into the dopamine hits that reliably ensure we hit the technology upgrade treadmill and spend spend spend don’t help our planet.
Use limits to learn – it might only have a maximum ISO of 400, no image stabilisation, and a sensor that goes blind as soon as a sliver of a highlight hits the photosites, but those old camera limits will teach you patience. They’ll teach you to consider dynamic range. They’ll teach you to slow down and compose each frame properly because the camera doesn’t have the same easy conveniences our modern cameras do.
An old digital camera will also teach you that photography is about more than expensive camera gear. I’ve said it before – people have been making wonderful photos for more than a century. Great photos are not restricted to the 21st century and camera gear that makes your bank account weep. If you’re not making good photos with a cheap camera, you’re not going to make good photos with a $6000 camera.
Just as I once developed a taste for the Fufifilm Finepix series of bridge cameras, it seems that I’ve developed a similar taste for old Olympus bridge cameras. I blame it on the recent resurrection of my Olympus C-725!
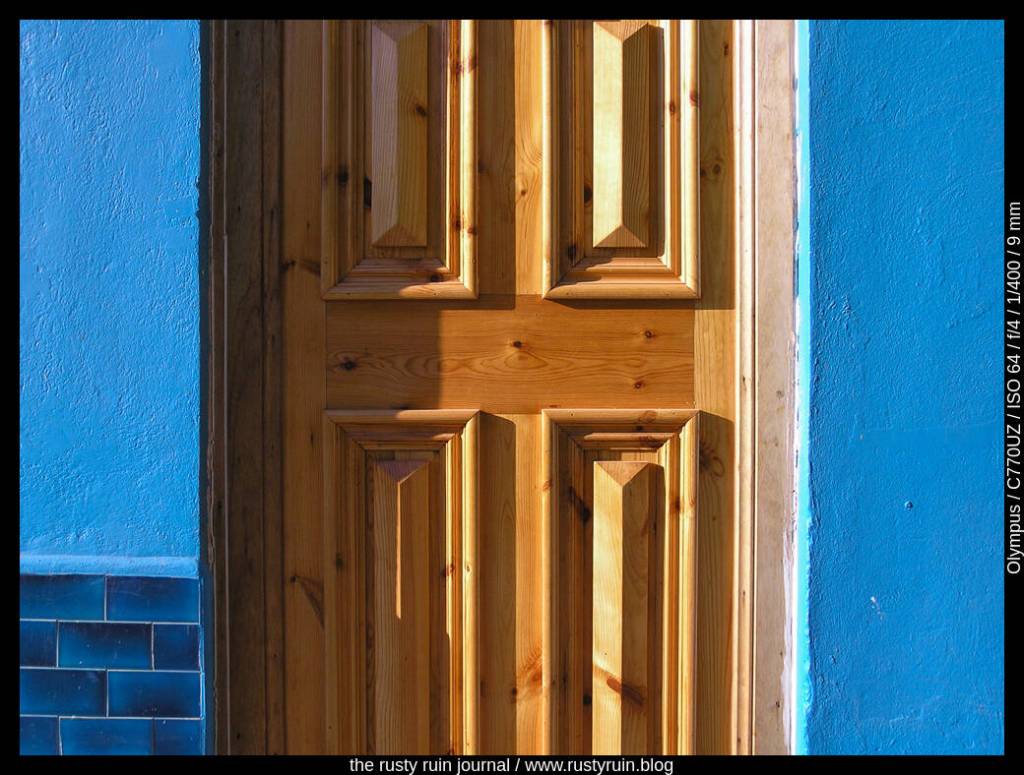
Behind the varnished door – Olympus C-770
On paper, the Olympus Camedia C-770 doesn’t seem like much: 4 megapixels, shutter lag that would annoy today’s impatient camera users, a 1.8 inch TFT screen, a longer start-up time than you’d hope for (good for those with a contemplative photography bent), and the need to use an XD card as a means of storage – let me tell you, those XD cards aren’t especially cheap.
Despite the negatives, there are surprising positives: an excellent lens with a sluggish 10x zoom; a decently fast 2.8 aperture at the wide end; a double (yes, double) flash for nuclear tests with unsuspecting portrait subjects; a respectable Electronic Viewfinder (yes, these old digital cameras carried the DNA of modern mirrorless cameras); a very readable EVF information overlay that includes a live Histogram; level settings for Sharpness, Contrast, and Saturation; the capability to record TIFF files if you can deal with the slow write times to the XD card (only 8 bit, unfortunately); and an enlarge feature that seems to engage an upsizing algorithm and makes those 4 megapixel files into 8 megapixel-sized files.
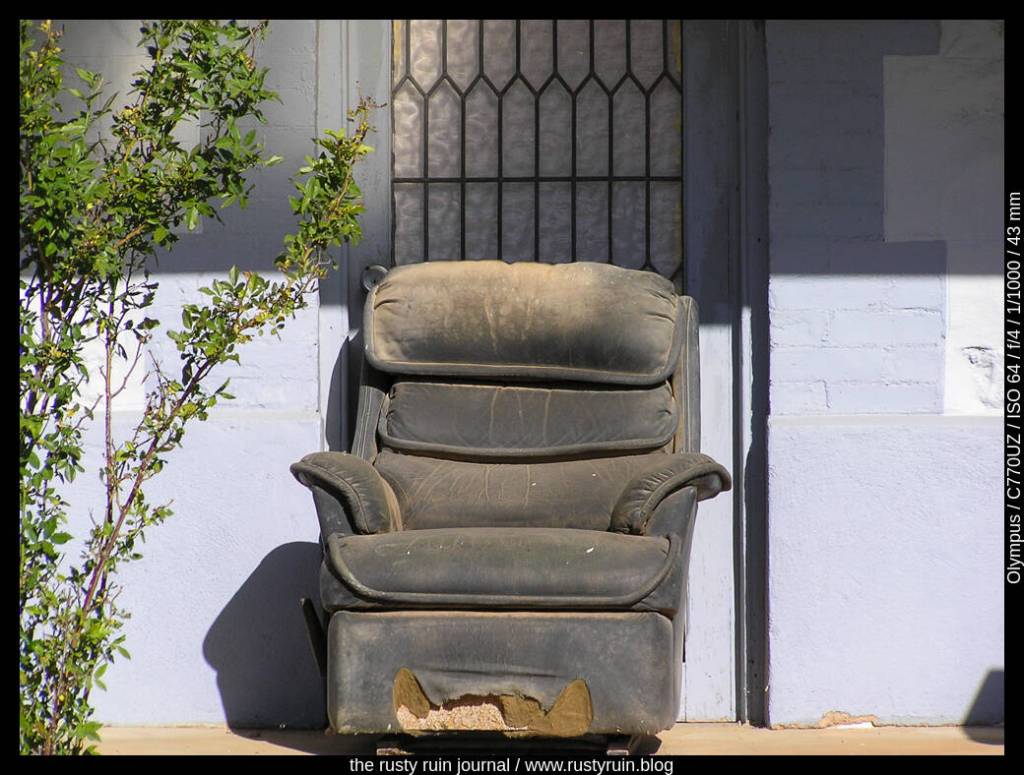
Have a seat – Olympus C-770 Ultra Zoom
I set the camera to record Super High Quality JPG files, dialled back the Sharpness and Contrast by -1, and increased the Saturation +1. Out of the camera, the images are pleasing. At 64 ISO, the digital noise pattern is so fine that it’s negligible. Of course, you wouldn’t want to push such an old camera beyond ISO 400 anyway, unless more digital noise is your goal. Nor would you want to entertain a low shutter speed when zooming enthusiastically, as there’s no vibration reduction or image stabilisation.
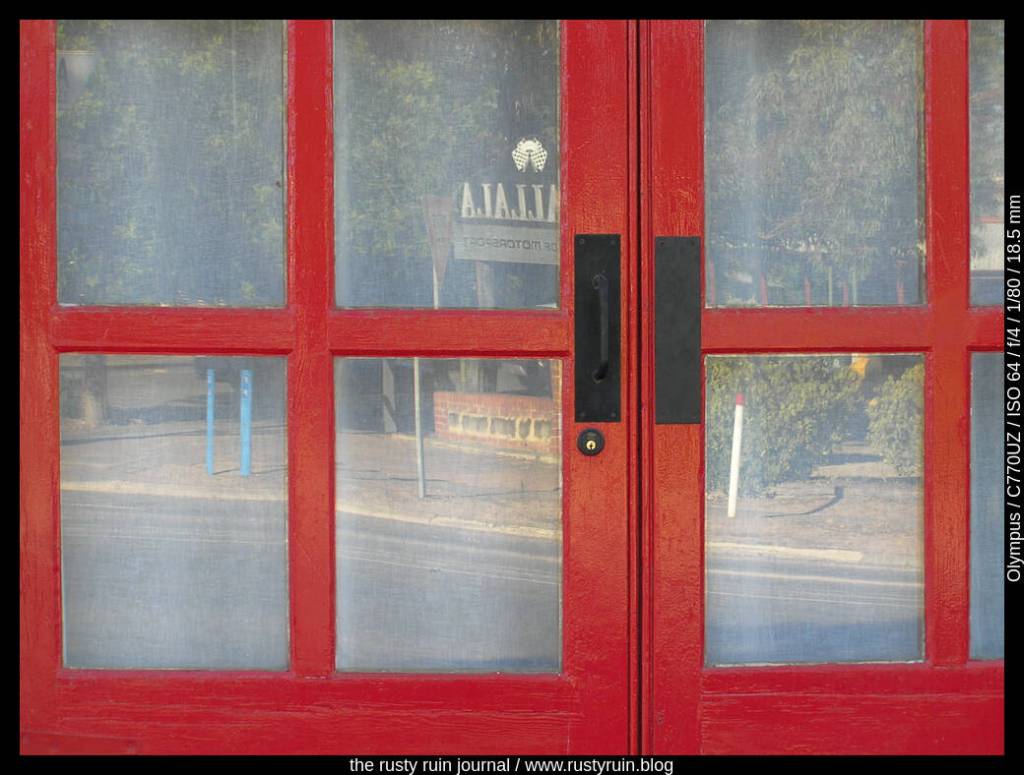
Red door corner – Olympus C-770
LIke the Olympus E-1, the Olympus bridge cameras are great little image makers when used within optimal limits ~ high dynamic range scenes will punish these old sensors and you’ll be forced to crush blacks or blow highlights. To compensate for these limits, I choose my scenes carefully – evaluating the dynamic range before putting the camera to my eye. Often, I’ll recompose, making decisions on how many shadows/highlights to include and how this will affect my vision for the final photo.
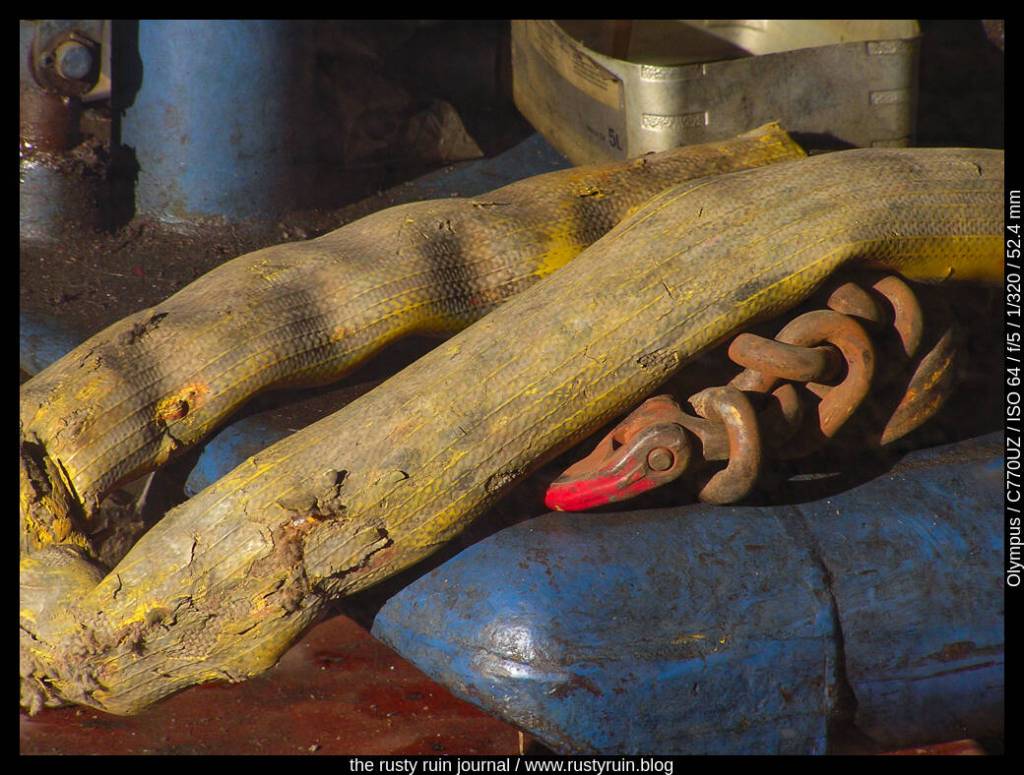
Worn and weathered gear behind the old shop window – Olympus Camedia C-770 UZ
I purchased the Olympus C-725 Ultra-Zoom sometime in 2004, excited by the prospect of the included manual modes and extra features as a step-up from my Kodak. At the time, I was eager to improve my minimal knowledge and explore the mode dial and learn the basics of photography. As it turns out, this silver all-plastic Olympus proved to be my bugbear. It would not be until 2013 that I picked up another camera more complex than this one.
Through the use of various cheap film cameras in the 1990s, I came to realise I had more than a passing interest in visual artforms. As digital photography started to take-off, I decided to nurture this growing interest and paid a lot of money for the Kodak. It was fun, but I decided I needed a more capable camera so I could brush up on the technicalities.
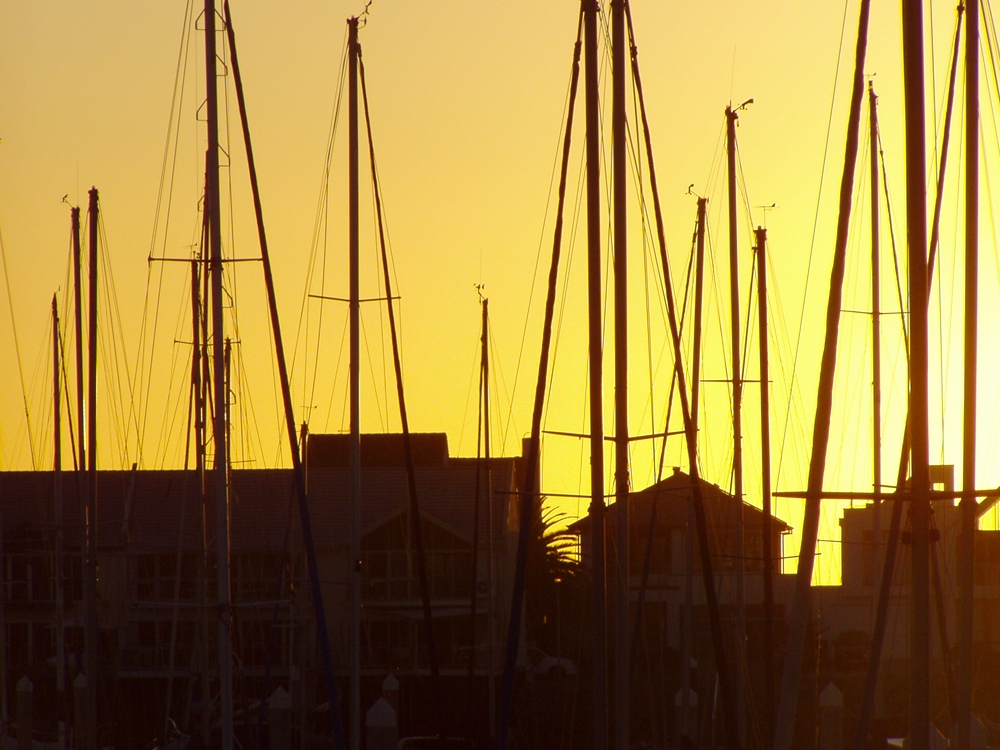
Homes and masts at the marina – Olympus Camedia C-725 Ultra-Zoom
I remember going out with my father, in mid-2004 perhaps, with the express intention of us both buying a new digital camera. He was always keen on new technology. As we browsed the shelves, we picked up every model from Fujifilm to Olympus to Kodak to Sony to Minolta. The model number particulars of the 4 megapixel Fujifilm camera that he purchased escape me now, and I’ve been unable to locate it in his boxes of things. It was the Olympus that appealed to me though.
The Olympus name resonated with me. It spoke of quality and longevity – something that seems both trivial and naive now in the context of the sale of their imaging arm in recent years and the rebrand under OM Digital Solutions. But 2004 was a different time in photography. It was the weird and confusing intersection of more than a century of film culture and the new digital kid on the block.
A silver finish, a boxy plastic design that would make modern mirrorless camera users weep, a mere 3 megapixels, PASM modes, and a huge 8x zoom caused me some excitement. Here, I thought, was a camera that could really teach me about photography! As it turns out, my father had a lot more easy fun with his pale gold plastic Fujifilm Finepix camera.
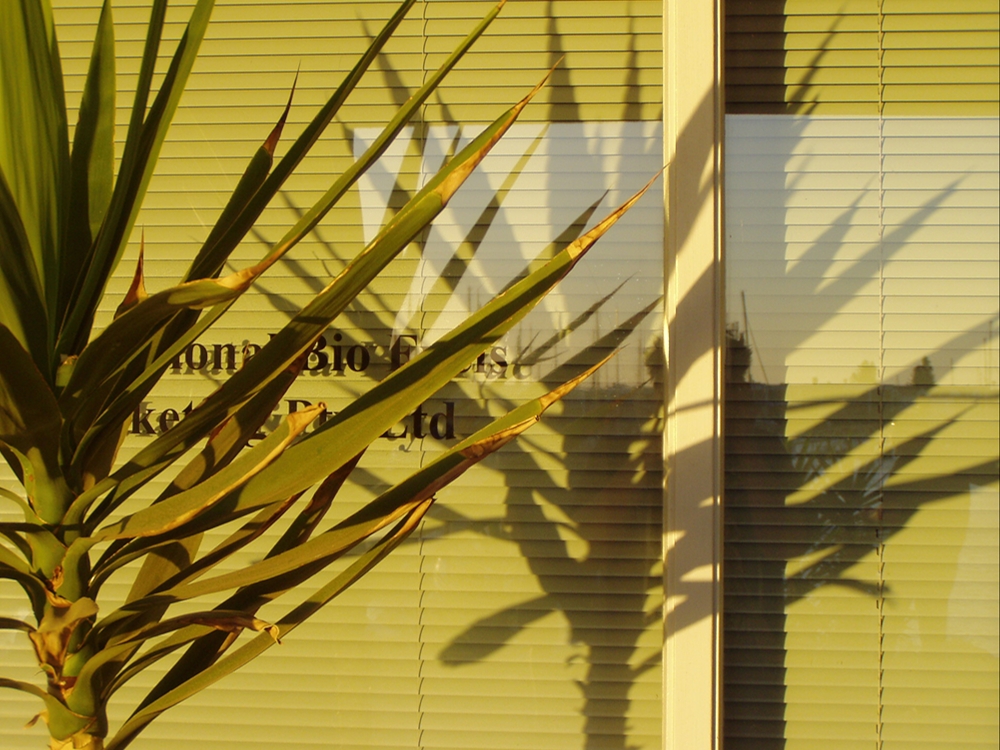
Sunset colours reflected in office windows – Olympus C-725 UZ
The heart of the problem is that I didn’t allow myself to have fun with this camera. Rather than focus on playful image making and the development of my eye and imagination, I placed enormous pressure on myself and turned the mode dial to Manual and left it there. That’s where I thought I had to be to learn properly. Not only did some early web forums demand this practice of newcomers, but I was also wont to be overly harsh with myself at the time. It may be that I used the mode dial to sabotage my learning.
After struggling for a week or two, all the fun drained away and my initial enthusiasm turned sour. I put the Olympus in a drawer and told myself sternly I’d never be able to learn proper photography. I limited myself to easy one-button point and shoot cameras until I purchased a Nikon DSLR in 2013 – almost a decade after buying the Olympus.
The Olympus was synonymous with my failure until I dusted it off last night and made some photos. I finally made my peace with myself and the camera. Maybe the experience also taught me I wasn’t ready for that type of learning at the time and that using easy cameras for a while was the best thing I could do because it was fun.
So, I’ve come back to the boxy silver Olympus and, having once discarded it in the throes of self-disgust and wasteful gadget buying that speedy technological transitions in consumer societies encourage, I’m finding it a joy. It may be a cumbersome and slow thing, with a design that speaks to the early 2000s, but the photos are quite pleasing I think.
Blue boat at sunset
Limited to a maximum shutter speed of 1/1000th of a second and ISO that tops out at 400, it demands the right conditions for the best results. My fingers fudged over the various buttons without the benefit of muscle memory last night, but I think the photos have a nice quality about them. I set the Sharpness and Contrast to Low, so as to provide maximum editing flexbility. I don’t mind the softness of the images though. The lens gets pretty mushy around the edges of the frame, especially at maximum zoom, and there’s plenty of chromatic aberration in backlit scenes, but after using so many cameras in the twenty years since I hid the Olympus away in self-despair, I’ve broadened my aesthetic sensibilities enormously.
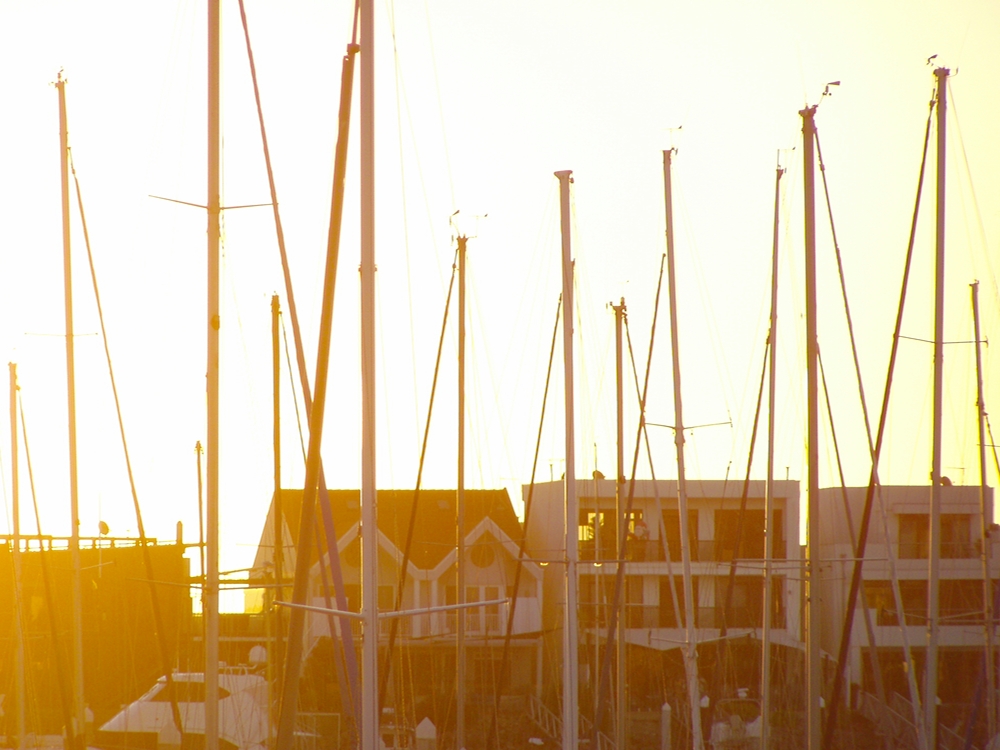
Here’s a photo that’s overexposed. I like the dreamy look of it and that the optics picked up the nice veiling orange flare from the setting sun:
Dreams of the marina by the sea – Olympus C-725 UZ
When deciding what camera gear to pack for a long holiday on the road, it’s true that I’ve never quite packed right. One can’t be prepared for all occasions and there’s always the thought in my mind that I need to pack light, lest I strain a muscle or two. As it turns out, I could have packed the optically superior 70-300mm Nikkor ED VR lens over the Nikkor 200mm DX VR. I should know by now that when deciding between packing light or packing heavier, but optically better, lenses, I should prioritise the better glass, even if it means a sore shoulder at the end of the day.
It’s not that the Nikkor 200mm is a terrible lens, it’s just old and performs better on older Nikon bodies that don’t demand so much resolving power from lenses. Even though the Nikon D3400 is a lightweight consumer-grade camera, Nikon still managed to squeeze in a top class crop sensor.
So, what to do when I need the extra reach that an optically questionable telephoto lens gives me, but it’s going to produce soft photos with lower contrast? This is where the available gear informs thought, idea, behaviour, and photographic practice. Optically inferior lenses are useful in their way ~ the shape and tonality of distant mountains shrouded in haze and evening mist – the colour of enormous clouds at sunrise. Even old glass is capable of good photos when limits are understood. If sharp detail isn’t possible, colour, tone, and shape may present as important themes, as in this case.
Mountains of blue, Townsville QLD – Nikon D3400 and Nikkor 200mm DX VR lensLong morning clouds near the Gulf of Carpentaria, QLD – Nikon D3400 and Nikkor 200mm DX lens
In my ongoing efforts to further crappify photos from the Camp Snap camera in the quest for feel and vibe, I’m definitely finding a grungy digital look with soft edges. I might not be able to tame the woeful oversharpening and noise reduction of the firmware, but I can absolutely stick some terrible pieces of glass and plastic in front of that tiny lens. Here’s where I really lean into the bad – the soooo bad, it might even be good. Maybe…
Arriving at the station – Camp Snap V105 with double softening filter in low light
Low light, two filters, and a tiny sensor, made through a car windshield – that’s a recipe for an image so grainy you could almost eat it with a spoon. I think it delivers some special digital vibe in a very lo-fi way.
Speeding through digital existence – Camp Snap with all the bad digital stuff
I’m really encouraging all the grain and the blown out highlights in the photo above. Those two stacked diffusion filters and low light conditions have slowed the shutter down so that the train is blurred. Add some spicy high ISO to the mix and this is the sort of image that most photogs would thumb their noses at. I like it. My favourite of the lo-fi digital train series.
I recently purchased something I don’t usually look at – a toy camera that’s been doing the rounds on social media and seems to be popular with Gen Z and others who are looking for some kind of vintage-film-vibe from a digital camera. The Camp Snap is founded on some solid principles: an easy to use camera that kids can use on Summer Camps. In that context, the Camp Snap is actually kind of cool. So, is it any good? Is it worth picking up?
I can thank a gift card for bringing down the price to a level where I was actually interested. Otherwise, this is definitely an overpriced hunk of light plastic for what is essentially a cheap webcam in a shell. And if that sounds like bad news, then it’s likely only bad news if you’re looking for a quality camera that makes quality pictures. But if you’re in the mood for something that could be fun, and you also have a flexible attitude to image-making, then the Camp Snap might be of interest.
Tree at sunset – Camp Snap with my custom filter
Camp Snap camera features
It’s a simple plastic camera for kids with a shutter button that lights up in green, a USB C port for image transfers and charging, a LED flash that’s quite weak, a tiny CMOS sensor that produces 8 megapixel JPGs, and no screen for image reviews apart from a single readout that tells you how many photos you’ve made. Oh, it also comes pre-installed with a 4GB Micro SD card/TF Card. You can change the card if you unscrew a small panel. About the most annoying thing I’ve so far found is that the rubber covering over the USB port is recessed and hard to get my too-short fingernails underneath to lift up.
One thing I like is that it’s possible to use an online tool to create your own filters, spit out a *.flt file, and then drag it across to the root directory of the SD card. When you switch it on, the operating system reads the custom filter and applies the values – contrast, saturation, brightness, hue, RGB gamma – to every photo. In the photo of the tree above, I used a custom filter where I’d altered the RGB gamma values and emphasised mostly greens. It’s a quick experimental filter, so I’ll see how it goes.
Just quickly, if you like this post and want to read more of my words on photography, old cameras, and such, just fill in your email below. I’m grateful for every connection in this digital abyss!
Two trees – Camp Snap V105 with my custom filter
The bad news
If you’re looking for quality images, don’t buy a Camp Snap camera. It’s as simple as that. Hard to believe that anyone would think a cheap toy camera would make quality photos, of course. The photos have plenty of digital noise, are waaaaay oversharpened, and are aggressively denoised. This terrible combination results in photos that look like impressionist paintings when you zoom in. And even if you don’t zoom to look at the aggressive smoothing, you can see distinct sharpening haloes in high contrast scenes. I suspect all of this is to combat the teeny-tiny-noisy CMOS webcam sensor. In modern digital camera terms, it’s a piece of crap.
Vintage vibe?
I guess if you’re into that oversharpened and oversmoothed digital photo look from a 2007 mobile phone, then you’ll consider the Camp Snap a vintage photo-maker. I’ve read claims of it looking film-like and vintage, but this is not film. It really doesn’t look like film. Online claims of the photos looking vintage beyond the results of an old phone camera are a stretch. It’s a maker of jaggy digital images. If you want the film-look, buy a cheap consumer film camera from the 90s. Just be aware that it’s gonna cost you a bunch in film and development costs.
The good news
I bet you’re thinking this is a truly awful camera and I have some premium regrets, right? Actually, no. Apart from the fact that a gift card saved my bank account from what I think is an overpriced and slightly overhyped product, I didn’t buy it thinking it was going to make me quality photos (I have enough Nikon cameras for the whole neighbourhood, frankly). And that’s kinda the point of the camera.
The Camp Snap is easy to use. Really easy. A full battery charge is supposed to last for around 500 photos. That means you can slip it in your pocket day after day and make so many spur of the moment photos that you’ll forget about them until you come to download them – a bit like making film photos and then discovering undeveloped rolls in your drawer much later.
Speaking of spur of the moment, that’s probably the best thing about the Camp Snap. A cheap camera with no screen for reviewing images, a single plastic shutter button, and focus-free operation is a recipe for making photos without the mind being overburdened. It actually promotes a mindful-in-the-momentapproach to making photos. You’ll likely make photos of things you wouldn’t even normally bother with, just to see how they turn out.
That scene of a rubbish bin at sunset? You’re probably not wasting time grabbing your Nikon DSLR to record that moment. But you’ll probably slip the Camp Snap from your pocket, make a quick photo, and then move on. There’s a certain liberation in that. And as long as you don’t expect good quality, some of those photos might even have some digital charm.
Corrupted green – Camp Snap and a corrupted filter
The other cool thing is that you can make your own photo filters and drop them into the root directory. Want to push the greens? You can do that. Want more contrast and saturation? You can do that too. It’s nothing more complex than the sort of thing you can do in any half-decent image editor or phone application, but it does contribute to the fun factor.
That bad looking photo above was made using a filter that, I believe, became corrupted when I used Lightroom to apply tweaks to a PNG file provided by Camper Snapper (a custom third party Camp Snap filter maker) and then truncated to an 8 bit file instead of 24 bits on the file save. It reminds me of a grainy photocopy. What this little mistake tells me is that the Camp Snap provides room for experimentation, and I think that’s fun.
Light on the wall – Camp Snap camera V105 and my custom filter
Room to have fun
The Camp Snap camera might make bad photos, mostly, but I don’t think the makers lean into the bad quite enough. Rather than excessive smoothing and sharpening, I’d rather see more noise and softer images. I’d rather see less quality! This is not quite the digital version of the Diana camera!
You definitely don’t want to zoom in on these photos and pixel-peep, but at small print or web-viewing sizes, you’ll hardly notice the noise patterns or the excessive smoothing. That said, I doubt this is aimed at anyone who’s considering printing these photos out. As a way to focus purely on the moment, put it in a pocket, and return to the bad old days of terrible phone photos surrounded by friends and family and moments, I think the Camp Snap offers some value.
What I will be doing is degrading the photos further. In my short testing with an old Kodak Hawkeye lens in front of the Camp Snap’s tiny lens, the results are soft and colourful and very very blurry. I’ll be striving to make the photos dreamier in future.
There’s a place for a product like this, even if I disagree with the pricing. I can definitely see a lot of young people taking this out to use with friends to record some crazy moments. This is the real appeal of Camp Snap – a simple camera that harks back to the screenless disposable film camera, minus the development costs, and encourages experimentation and fun in the moment.
One common criticism I hear is: “Why would you want such bad and unsharp photos when you have sharp lenses and modern cameras?”
This question assumes that one should only care about sharp and technically perfect photos, as though cameras from yesteryear couldn’t make good photos. There are times when I want sharp photos with lots of latitude for editing and other times when I’m primarily interested in vibe and feel. Toy cameras like this fall into the feel and the vibe category. Even technically poor images can communicate something worthy to a viewer. In the end, it’s the images that matter and not the gear.
Kodak Hawkeye life – Camp Snap camera, freelensing with a Kodak Hawkeye lens
If you believe the more scurrilous online rumours, the quality of a camera lens from the former Soviet Union was directly proportional to the Vodka consumption of weary factory workers. This is not the colourful fancy one might suppose, as any factory line embedded in an economic and socio-political culture where wages are neither incentive nor punishment is more likely to be driven by exhausted hands and eyes.
None of this suggests that any cheap trinket or fast fashionable piece made today in vast factory cities by exploited workers and then sent abroad to be marked up for huge profits is any better. Always, there are grifters and exploiters taking advantage of the vulnerable and the gullible. But anyway…I digress slightly. The source of my Soviet-produced lensbeyond the factory floor is not a story for today.
The Zenitar 16mm 2.8 Fisheye lens is an impressive piece of Cold War glass. It’s a hefty thing in the hands, has a distinct and very short hood, a lens cap that can’t be used on any other lens, and looks great when the sunlight bounces off the large curved glass that sits right out front. On my trusty Olympus EM5 Mark 2, this 16mm Zenitar has a field of view equivalent to a 32mm focal length in 35mm format. So, if I was using it on my Z5, which has a 35mm sensor, the field of view is the native 16mm. Because my Olympus has a digital sensor that’s half the size of the one in my Z5, I double the 16mm to a field of view of 32mm instead.
Trudging through swampland at mid-afternoon – Olympus EM5 Mark 2 and Zenitar 16mm Fisheye
My copy of the lens is sharp enough at apertures F 5.6-8, and even at those settings the corners display a lack of sharpness that’s more fizzy than actually mushy – as though details are being pulled away from the centre and slightly distorted. The effect reminds me of using a plastic lens but I don’t find it unpleasant.
Capitalism harms us all – Olympus EM5 Mark 2 and Zenitar 16mm Fisheye
As with other wide angles, and certainly with all Fisheye lenses, there’s distortion. You can see how the normally straight cortners of the skip bins in the above photo look bowed. I don’t have an issue with it, as this is just a feature of the lens, but it’s not the sort of lens you want if you desire pleasant portraits, straight horizons, and distortion-free buildings (using the Nikkor 16mm 2.8 lens profile in Lightroom will straighten out most of the distortion if you really want that).
Lenses like this are great for getting in very close to a subject to take advantage of the optical distortions they produce. On the Olympus, however, the Fisheye effect is certainly much less because of the smaller sensor size, making it a really valuable wide-angle lens if you don’t mind manual focus, fizzy corners, and the chance that the quality of your copy may have suffered due to the effects of authoritarianism and the revolutionary whims of Vladimir Lenin.
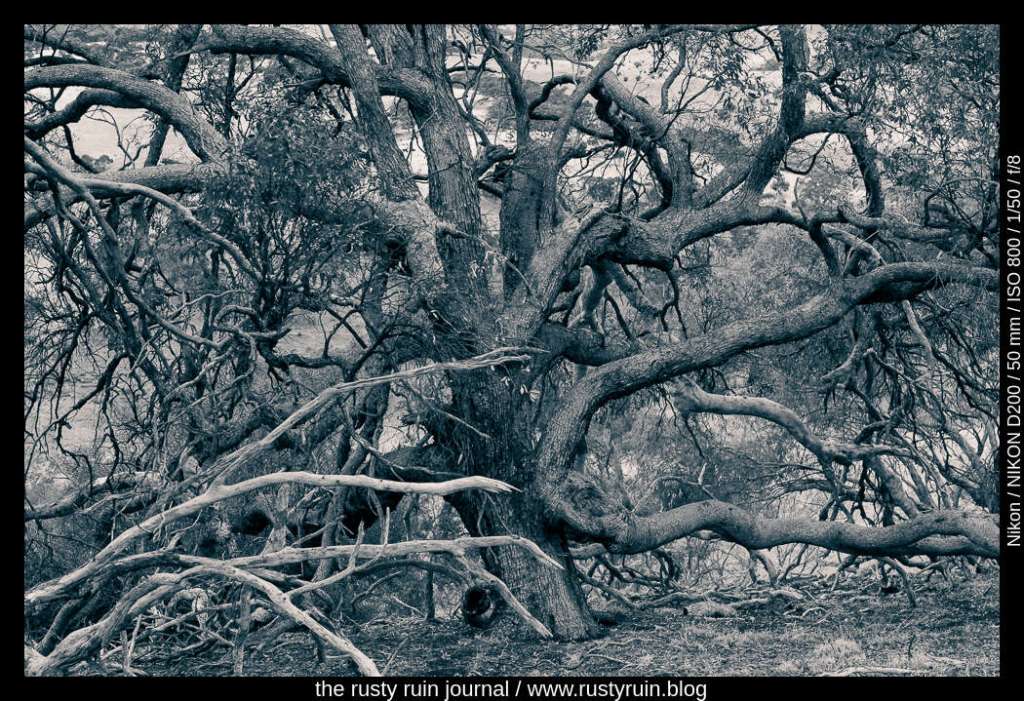
I’ve been trying to get out for shorter photo sessions in recent weeks because it’s not always possible to find a free day for an organised day-trip. At the very least, it gives me a chance to find some new locations and subjects. I can also pack a few older camera bodies and lenses without placing much pressure on myself to come back with plenty of photo winners. So, what do you do when the clouds are heavy, time is limited, the light is failing, and interesting subjects are lacking? Well, I happened to spot an interesting looking tree by the side of the road:
Twisting against the failing light – Nikon D200 and Tamron 17-50mm 2.8 lens
I don’t usually convert colour photos to black and white but sometimes it’s a good way to explore other qualities of an image. Black and white emphasises tonality, texture, and geometry. Just look at all of the twisting branches in the photo above. Even at ISO 800 in dull light, the Nikon D200 produces little noticeable noise. I didn’t bother to apply any noise reduction at all since the digital noise pattern is quite fine.
Here’s another version with more contrast, blue shadows, and warm highlights: